We Go the Extra Mile

Share article We Go the Extra Mile on:
FacebookTwitterPinterestPrint

Sprouts Brand Products for LunchWe seek out specially imported and better-for-you items to create unique taste experiences. Learn more about our authentically sourced products.

Market Corner Organic Bread

Made with 100% organic whole-wheat flour, our organic breads feature hearty whole grains and come in five nutritious varieties, including thin sliced!

Market Corner Sliced Cheese

Our rBST-free Market Corner cheeses have no added hormones and are made from creamy, whole milk for a difference you can taste.  

Butcher Shop Air-chilled Organic Chicken

Our Butcher Shop Air-chilled Organic Chicken is fed a certified organic diet while having plenty of access to the outdoors. With better flavor and texture, our organic chicken is tender and incredibly juicy.  

Did you know?

Air-chilled chicken is cooled by passing the meat through several chambers to be blasted by cold, purified air. This results in a more tender chicken since it’s not submerged in ice water to cool and absorb any excess. It’s also kind to the earth, saving 30,000 gallons of water every day. 


Mango and Pineapple Juices

Taste the tropics—with every sip! Enjoy 100% juice made with the sweetest, ripest mangos and pineapples from the Philippines. 

Cheese Bites

Our poppable, protein-packed cheese bites are made with 100% Italian cheese and are gluten- and lactose-free. They’re oven-baked for an incredibly crisp, crunchy bite that is sure to satisfy the cheese lover in us all.   

Vegan Pesto

A vibrant addition to any pasta dish; this pesto is sourced from Italy, completely vegan and very, very tasty. Spread on sandwiches or toss with cooked angel hair or penne for a simple, delicious meal in minutes.

Dark Chocolate Dipped Coconut Rolls

Imported from Thailand, these light, crispy rolls are made with real coconut milk and dipped in rich dark chocolate for an incredibly unique, sweet flavor experience.   

Eco-friendly Tips for Earth Day

Share article Eco-friendly Tips for Earth Day on:
FacebookTwitterPinterestPrint

Earth Day

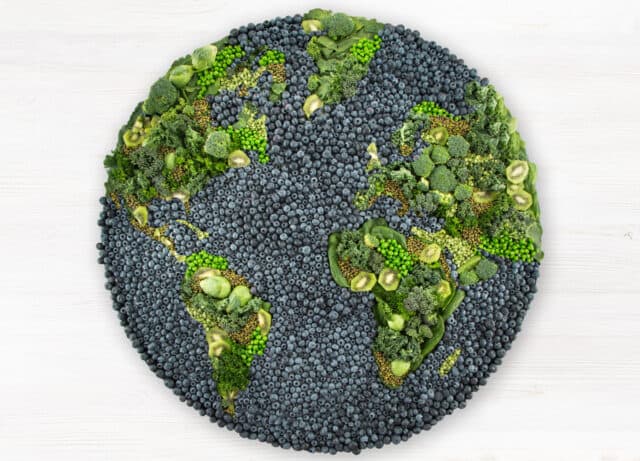
Celebrate the Earth from Home

There’s no need to go far–you can join in on the celebration with these five sustainable tips and DIYs.

Tip 1: DIY Sustainable All-purpose Cleaner

Put the clean back in your all-purpose cleaner! This DIY cleaner is free from harmful toxins, making it a better option for you and the Earth. Plus, it’s perfect for cleaning almost every mess.

Ingredients:
  • 1/2 cup Water
  • 1/2 cup White vinegar
  • 15-20 drops Essential Oil of choice

  • How to: In a spray bottle, combine and mix ingredients, shaking if needed.

    Tip 2: Composting

    Make your house plants and your planet happy with compost! Compost is the mixture of organic material that helps fertilize the soil that brings our Earth and all its plants to life. Not only does composting benefit the planet, but it’s also super easy to do at home!

    Step 1: Choose your location! Composting is easy to do both outside in your backyard, or inside in a bin. If you’re looking to compost outside, make sure it’s placed in a dry and shady area. If the outdoors isn’t your thing, no worries! All you need is a bin that you can leave under the sink, or on your counter.

    Step 2: Once you’ve decided where you’ll be composting, the next step is to gather your materials. Using dried leaves as the base of your compost, mix in kitchen scraps like veggies or fruits for your wet matter. Remember, you should always have about three times the amount of dry matter to your wet matter.

    Step 3: Now it’s time to layer! Keep using materials from your yard and your kitchen to build your compost. If your compost starts to smell, add dry material, and if it looks too dry, add water and wet matter. Make sure to turn your compost weekly. Once your compost appears to be a dark rich soil, you know you’ve succeeded—happy composting!

    Tip 3: Eat Plant-based

    Celebrate Earth Day by trying out a plant-based diet! Plant-based nutrition is a diet derived from eating plant-based proteins, dairy alternatives and even meatless meats! Now, with so many delicious options, going plant-based for yourself and the planet is easier than ever!

    Good for You: A diet that incorporates more plant-based foods is shown to be higher in dietary fiber and lower in saturated fats and calories when compared to diets higher in meat and dairy intake. Eating more plant-based foods may also help maintain healthy heart function, blood sugar levels and cholesterol.

    Good for Our Earth: The production of plant-based products has proven to be an environmentally sustainable enterprise. By reducing the production of animal-based products and increasing the consumption of plant-based products, communities can lower greenhouse gas emissions and reduce waste and energy usage.

    Get into the festivities this Earth Day by cooking up some delicious, plant-based recipes–perfect for supporting you and our Earth!

    Tip 4: Reusable Water Bottles

    A reusable water bottle is an easy and cost-effective way to be good to our Earth! Single-use plastic bottles often don’t get recycled, making them harder for our Earth to break down. Luckily, glass and stainless-steel water bottles can be bought just about anywhere and are the perfect on-the-go.

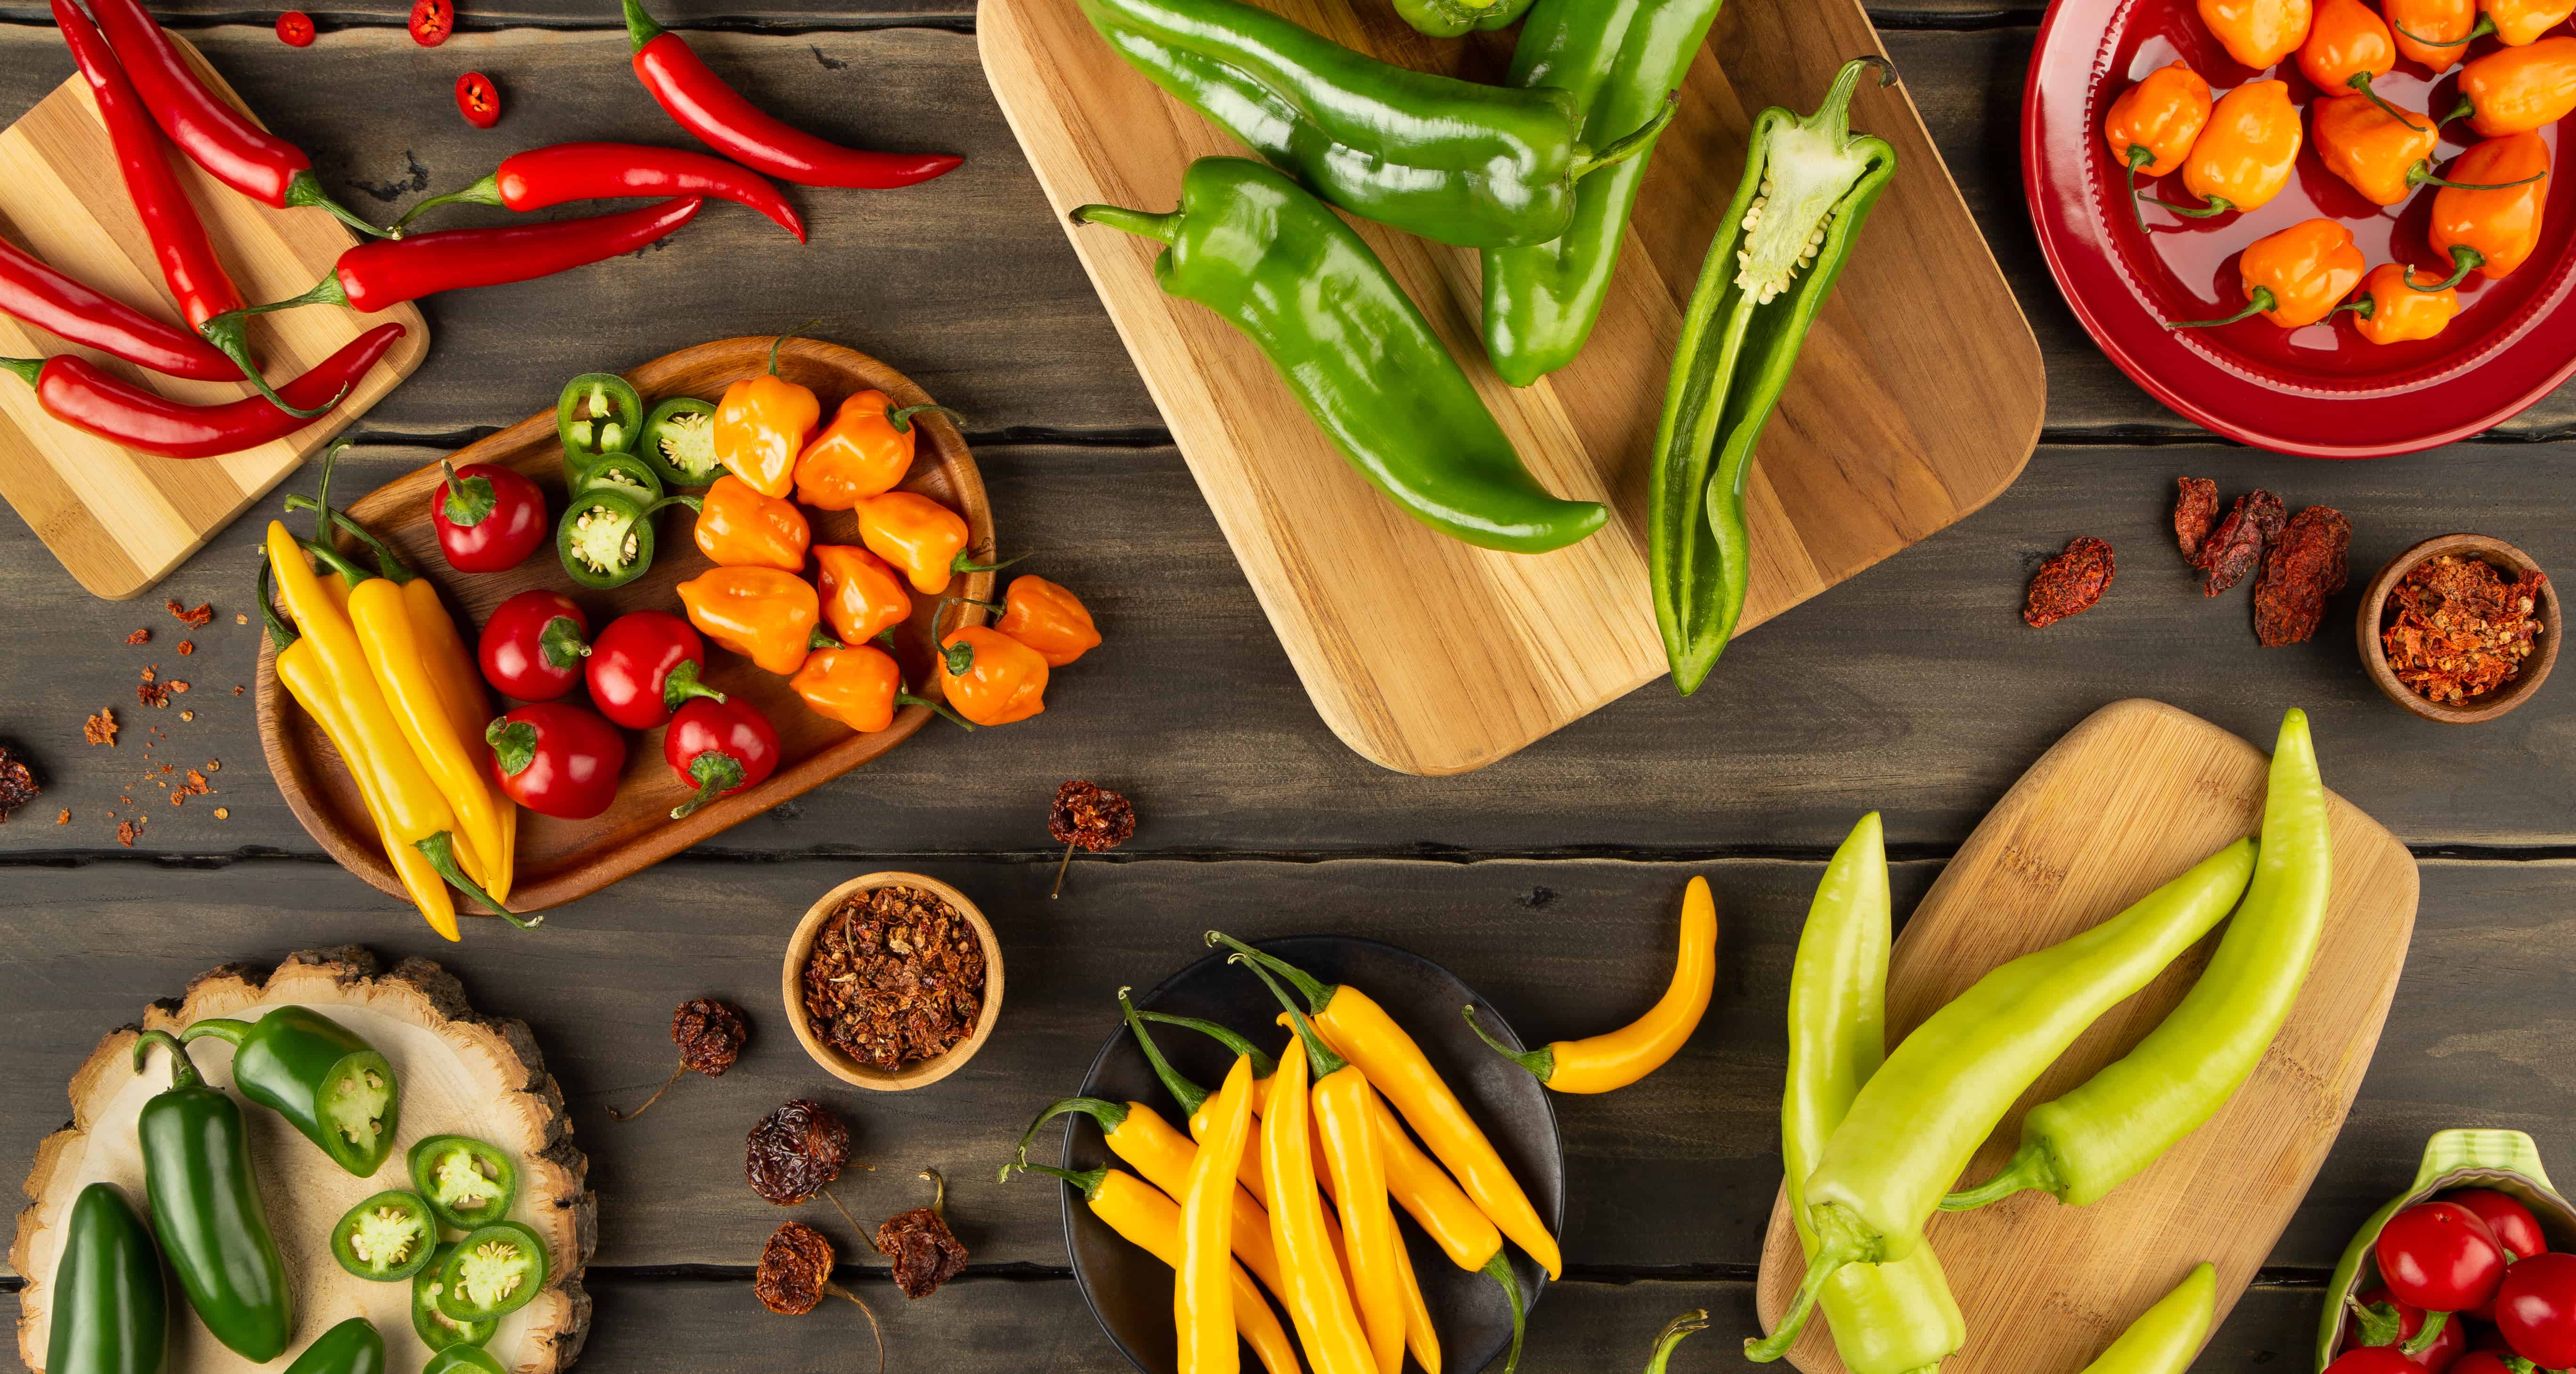
    Tip 5: Grow a Food-scrap Garden

    If you’ve got leftover scraps from your produce, you can easily grow more with these simple tips. Try this variety for an at-home salsa garden.

    Tomatoes: Remove the seeds from the inside of a ripe tomato, allow them to dry and plant in a small pot of soil. Place in direct sunlight and water two to three times per week. Once the plant is large enough, you can move it to a bigger pot and continue growing it outside.

    Peppers: Peppers are great to have on hand for a variety of recipes! The best part is that they’re super easy to grow on your own. Take the seeds from your pepper and plant them in soil, avoid direct sunlight and watch them grow!

    Garlic: Next time you bring home a head of garlic, remove one of the cloves and plant it with the root down in the soil. Keep outside in the sunlight and water two to three times per week.

    Cilantro: Cilantro can grow new leaves by simply placing the stems in a shallow cup of water near, or on a windowsill–it’s as easy as that!

    Onion: Cut the root of the onion at about 1/2-inch thick and place in soil. Allow the onion to get plenty of sunlight and keep the soil moist by watering as needed.

    SHOP OUR FAVORITE SUSTAINABLE BRANDS
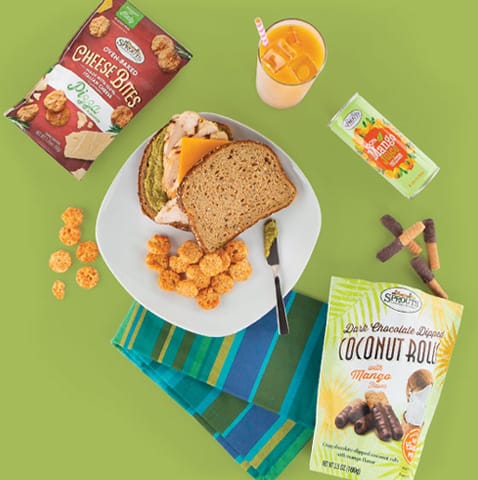

    5 Easy Ideas for Throwing a Grad Party

    Share article 5 Easy Ideas for Throwing a Grad Party on:
    FacebookTwitterPinterestPrint

    by Katie Sullivan Morford, RDN, founder of Mom’s Kitchen Handbook  Graduation party food ideas
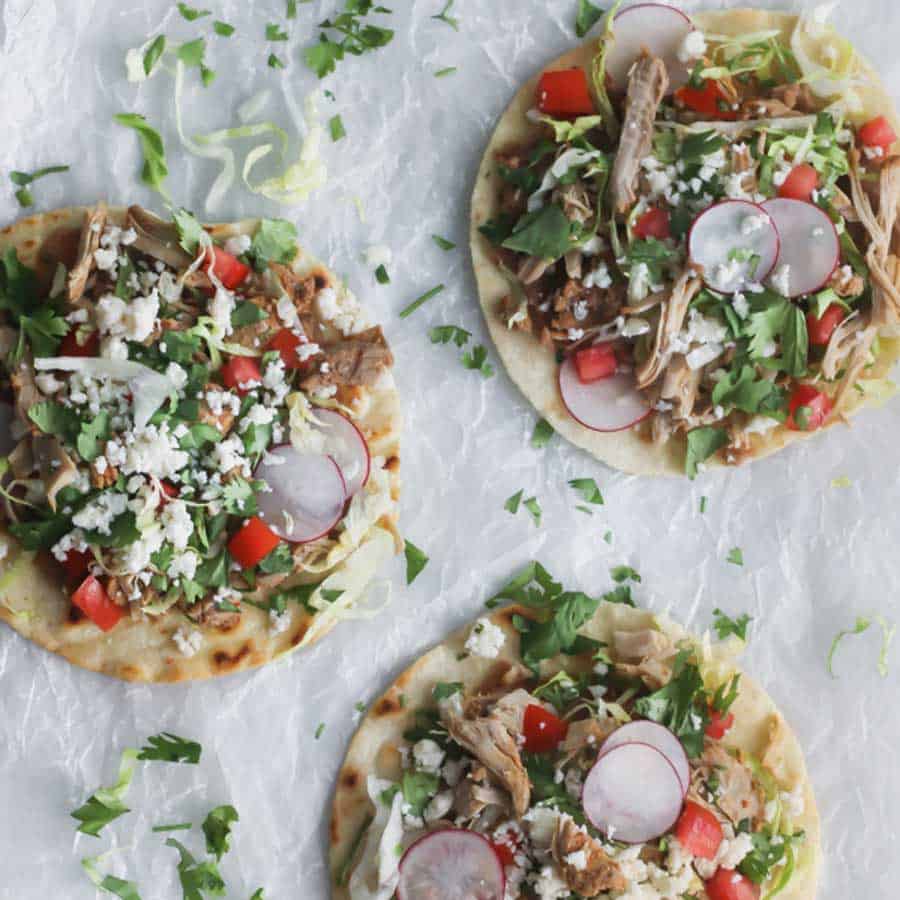
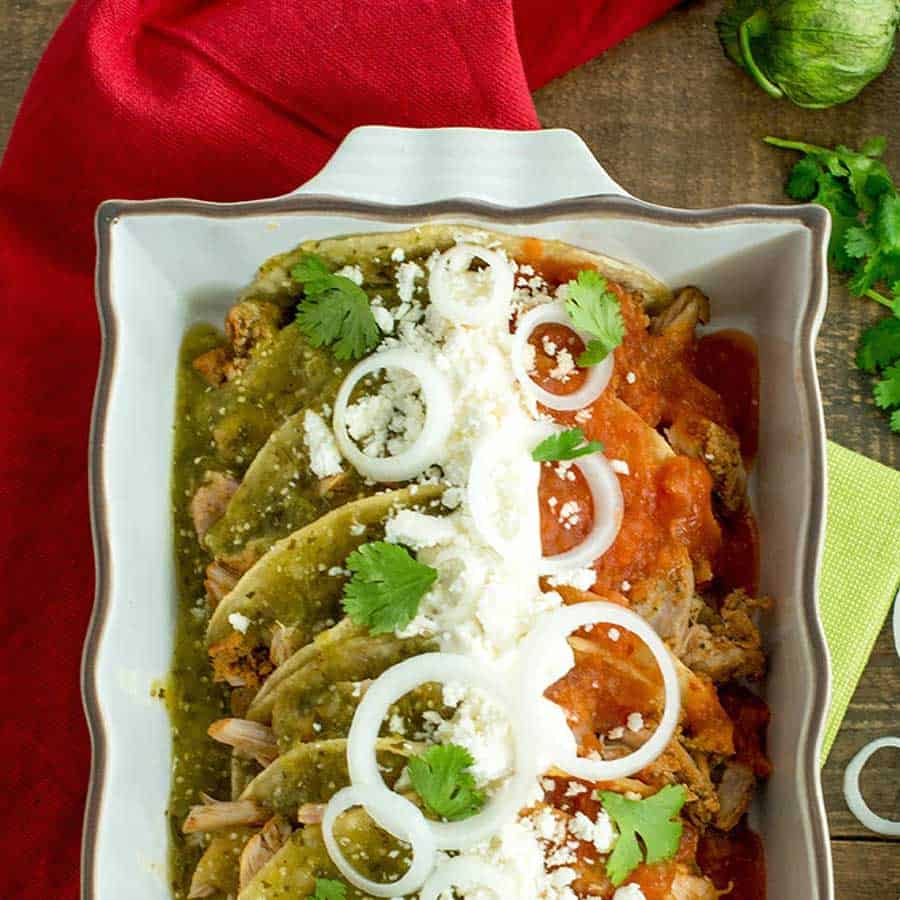
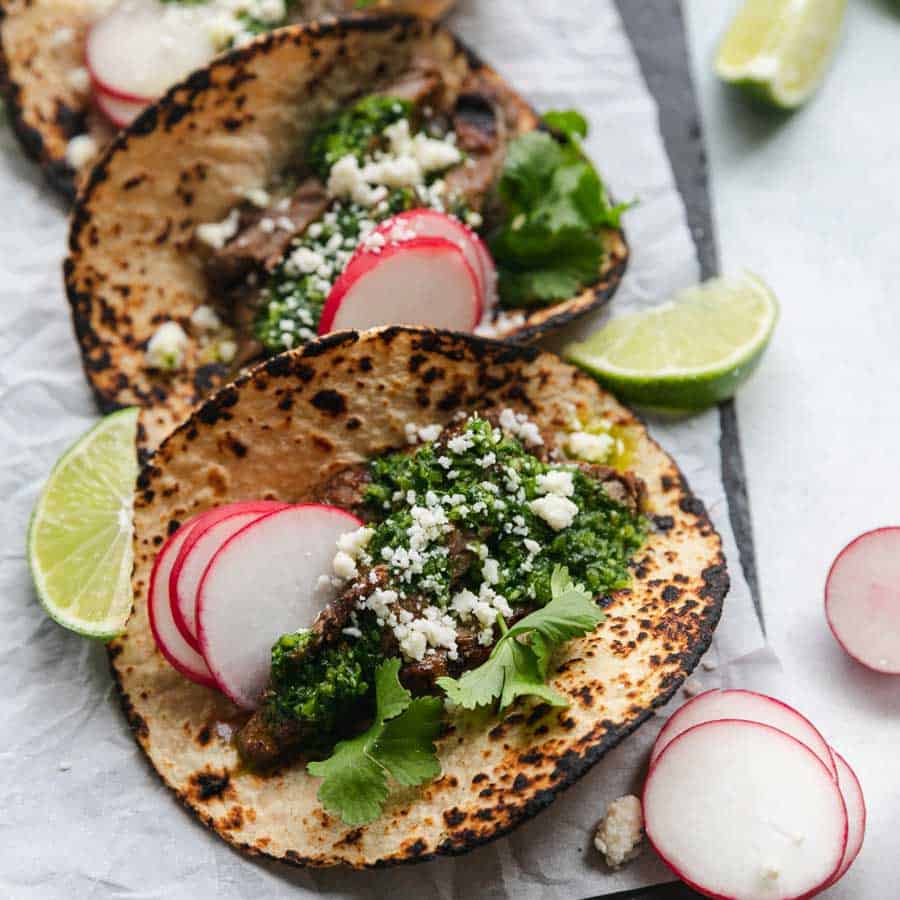
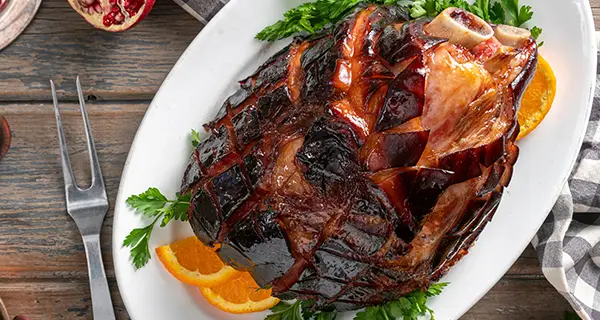
Graduation is nearly here. If you’ve got a high school, college or even grad student about to collect a diploma, festivities are in order. It can be tricky to plan and execute, since graduation season can feel overwhelmingly busy. Just know that there is no one-size-fits-all way to celebrate. Here are five fun graduation party food ideas—pick the right one for you and your graduate.

    Backyard BBQ

    With the weather warming up, move the party outdoors to minimize indoor chaos. It’s an ideal solution for more casual gatherings. Go with ribs, burgers and dogs, making sure you have a main dish option for vegetarians as well. Add a few favorite salads and a platter of fresh fruit, and your job is done.
    • Make It Special: For dessert, arrange a make-your-own-ice-cream-sandwich bar. Set out Bakery Cookie Trays from Sprouts, a tub of vanilla ice cream, and an ice cream scooper and let everyone get to it.

    Open House

    If you want to invite a lot of people without a lot of work, an open house is the way to go. It can be as straightforward as putting together a few simple appetizers and setting up a bar with your favorite drinks. With Sprouts, you can make it a little more substantial with no effort by ordering Pretzel Hoagie Platters along with a Fresh Vegetable and Hummus Tray.
    • Make It Special: Create a signature mocktail to serve the graduates, such as pineapple/orange juice blended with fresh strawberries served over ice with little paper umbrellas for added flair.

    Sit-down Dinner

    For something on the more intimate side, a sit-down dinner is a pretty sweet way to celebrate. Start off with an elegant Signature Cheese Tray from Sprouts. For the entree, side and salad, poll your graduate to find out their favorite dishes. If they’re off to college, these are the recipes they’re going to miss!
    • Make It Special: Put your graphic design skills to work by printing an official menu to put at each place setting. It will make the evening feel special and doubles as graduation memorabilia.

    Brunch

    Depending on the timing of graduation, doing brunch can be a lively way to celebrate. If you have a signature brunch recipe, now is the time to pull it out. If not, start by settling on one main dish, ideally something you can make ahead, such as an egg casserole or baked French toast. Fill in from there by adding a Fresh Fruit Trays and a European Bakery Tray from Sprouts. Make it extra pretty by arranging the fruit and baked goods on your best platters (nobody needs to know they didn’t come out of your own kitchen!).
    • Make It Special: Pick up flowers and balloons that are the colors of your graduate’s soon-to-be school. It won’t go unnoticed.

    Potluck

    If your budget is tight, consider joining forces with families of other graduates and host a potluck. Map out a game plan, dividing up main dishes, sides, salads, desserts and beverages so you have a nice balance on the table. Keep clean up easy (and eco-friendly) by using the compostable paper goods sold at Sprouts.
    • Make It Special: Gather or make a few silly props, masks, and signs, and set up a make-shift photo booth. If you can get your hands on an instant camera, everyone goes home with a memento from the day.

    Instagram Story Giveaway

    Take a peek at our Instagram Story on Wednesday, 5/8 for a chance to win Katie’s cookbook! No purchase necessary to enter or win. The giveaway is open to legal residents of the United States who are 18 years of age or older. Official rules.
    Katie Sullivan Morford

    Meet Our Food Blogger

    Katie Sullivan Morford is a food writer, registered dietitian, and author of the recently published book PREP: The Essential College Cookbook. She has two other cookbooks, Rise & Shine: Better Breakfasts for Busy Mornings and Best Lunch Box Ever. Katie has written and developed recipes for a number of publications, including Real Simple, Family Circle, Parents, Self, the San Francisco Chronicle and the New York Times. She is also the voice behind the popular blog Mom’s Kitchen Handbook, which features recipes, nutrition advice, and weekly meal plans for busy families. Katie has an undergraduate degree in English literature along with a Master’s Degree in Clinical Nutrition from New York University. She lives in San Francisco with her husband and three daughters. Katie Sullivan Morford: Moms Kitchen Handbook

    Sports Nutrition: Get the Most from Your Workout

    Share article Sports Nutrition: Get the Most from Your Workout on:
    FacebookTwitterPinterestPrint

    sports nutrition supplements surrounded by workout equipment

    Kick-start your health goals!

    Starting a new health and fitness routine can be overwhelming. We’re here to break down what pre and post-workout nutrition looks like, so you can focus on grabbing your gym bag, nourishing your body with delicious but nutritious food, and crushing your health goals—no matter what they may be!

    Focus on nutrition first

    An important first question to ask is, how hard are you working out? Are you strolling around the block a couple of times, or taking your 10-mile, half-marathon training run? The harder your workout, the more key it is to fuel up as well as replenish your body’s nutrients. Undereating or not eating the right balance of protein, fats and carbs could leave you feeling sore and run down. So ensure you’re nourishing yourself properly throughout the day to repair and recover for your next workout.

    Vitamins & supplements

    No matter what your fitness level is or how hard your exercise routine may be, getting all the nutrients your body needs for optimal health is a worthy goal. Even when we’re eating our best, sometimes we miss our nutritional mark. A simple daily regimen that includes multivitamins, omega-rich oils, probiotics and superfoods is a great practice. At Sprouts, we call this the Essential 4—read more about the benefits of these supplements!

    Meal timing

    As with many things in life, timing is everything. Fueling up about one to three hours before you intend to exercise is ideal. When you’re finished, refueling 15 to 20 minutes after your exercise is best. If that sounds unmanageable, having a post-workout snack within an hour to an hour and a half still helps your body to maximize those nutrients, replenishing the muscle proteins that were used up with activity.

    Protein & carbs

    Now that you know whento eat before and after a workout, what about the what? Protein plays an important role in rebuilding and repairing your body. That’s why it should be a part of both your pre and post-workout routine. Likewise, it’s equally important to take in carbs before and after—they’re the fuel your body craves!

    Pre-workout

    You may want to consider a pre-workout supplement to help keep you focused and motivated. Here are some of the things you might see listed in the ingredients:
    • Taurine is an amino acid found in the brain, organ tissue and muscles. A neurotransmitter, it regulates the transport of nutrients throughout the body.
    • Creatine is synthesized from amino acids and may help to improve muscle performance as well as lessen cramping.
    • Citrulline is an amino acid that naturally occurs in your body. It may help increase blood flow to your body’s tissues.
    • Beta-alanine is an amino acid produced in your liver which may help delay muscle fatigue.
    • L-arginine helps create nitric oxide which relaxes your blood vessels, allowing for better blood flow and oxygen exchange.
    • Betaine is a fat processing amino acid that helps to maintain liver function.
    • Caffeine can help raise your metabolic rate, improve endurance and reduce fatigue because it stimulates your central nervous system.
    • Guarana is a plant-based stimulant with two times the caffeine of coffee.
    Note: If you’re watching your caffeine intake, a way to gauge the amount in a supplement is to remember a cup of coffee has about 95 milligrams of caffeine in it.

    Recovery & Post-workout

    Developing a post-exercise routine is important for recovery as well as maximizing the effects of your workout. Remember the three Rs:
    • Refuel: Now is the time for carbohydrates—your body needs them to replenish glycogen!
    • Rebuild: After you’ve exercised, your muscles are most primed for the protein they need to rebuild themselves.
    • Rehydrate: Remember to stay hydrated. Water enhanced with electrolytes (sodium, magnesium, calcium, potassium) helps restore balance in your body. Or try coconut water, it’s filled with naturally occurring electrolytes.
    In addition to getting the three Rs, you’ll want to be sure to get some good Zs. While we are sleeping, our bodies focus on muscle recovery, hormone balance and neurological restoration—all crucial to our overall well-being as well as athletic performance. Explore more about this foundation of good health.

    Shop Fitness Essentials

    SHOP NOW

    Peppers: Hot, Hotter, Hottest

    Share article Peppers: Hot, Hotter, Hottest on:
    FacebookTwitterPinterestPrint

    Chile Peppers

    So Hot Right Now!

    Loaded with nutrients like vitamins A, C and B9 (folic acid), peppers are also low-calorie and a good source of fiber. You can’t talk about peppers without talking about capsaicin, the chemical compound that provides the heat we experience when eating peppers. It can make you sweat, your eyes water and nose run. Capsaicin can also release a rush of endorphins—which is why some people love them! The hotness of a pepper is measured by the Scoville heat scale ranging from zero to 16 million SHU (Scoville heat units). For reference, bell peppers rank zero SHU and jalapeños weigh in at 2,500–8,000 SHU.

    Types of Hot Peppers You’ll Find at Sprouts

    Long Hots (100–1,000 SHU)
    • Sweet with a slight sizzle
    • Roast ‘em or pan fry with olive oil
    • Not as hot as a jalapeño
    Anaheim Pepper (500–2,500 SHU)
    • Mild fruity sweetness with a touch of heat
    • Super versatile, try them in salsa or chiles rellenos
    • Usually green, when left on the vine to turn red, they’re called chile Colorado
    Hungarian Wax Pepper(1,000–15,000 SHU)
    • Tangy, it looks like a banana pepper, but has more heat
    • Great tossed in a salad
    • Can be eaten raw
    Jalapeño (2,500–8,000 SHU)
    • Perfect for those who like a little kick
    • A smoke-dried jalapeño is called a chipotle
    • Can be eaten raw and are perfect in pico de gallo
    Habanero (100,000–350,000 SHU)
    • Fruity flavor with serious fire
    • Good for mixing with tropical flavors like mango in salsa
    • Range in color from yellows, to oranges and reds
    Ghost Pepper (855,000–1,041,427 SHU)
    • Fruity and tropical, intensely hot
    • Whip up a BBQ sauce
    • 100 times hotter than a jalapeño
    Dried Reaper (1,400,000–2,200,000 SHU)
    • Sweet and fruity with fiery heat
    • Mix into a hot salsa
    • A cross between a ghost pepper and a red habanero

    What to Do If You’ve Eaten a Pepper That’s Too Hot

    Your natural inclination after eating a pepper-shaped inferno will likely be to reach for water—after all, you feel like your mouth is on fire. This would be a rookie maneuver though. Capsaicin is an oil; and oil and water don’t mix. Drinking water will just spread the fire. Instead, try one of these remedies.
    • Water & vinegar mixed together, can be swished and spit out. This combination helps to break down the fats of the capsaicin, cooling your mouth.
    • Beer with a healthy squeeze of lime can have similar results as the water and vinegar combination (but you can drink this elixir!), with the added bonus that the carbonation has a cooling and soothing effect as well.
    • Dairy, because of the protein casein, can help to neutralize the heat as well. If you’ve made your dish too spicy, tone it down with a dollop of sour cream or plain Greek yogurt—it’ll make a world of difference.

    TIP:

    When you’re prepping and cooking peppers, always wear a pair of latex or nitrile gloves to keep the oils from getting on your hands. If you don’t have gloves? Don plastic bags while you chop and prep the hot peppers.


    START YOUR SHOPPING LISTORDER FOR DELIVERY

    Traditional Ham with a Twist

    Share article Traditional Ham with a Twist on:
    FacebookTwitterPinterestPrint

    Put together a delicious Easter spread full of uncured and gluten-free centerpiece hams—every bunny will say
    the meal is “ham-tastic!”

    Baked Ham with Apricot
    and Orange Glaze

    Flavors from the apricot and orange will surprise your taste buds and have everyone going back for seconds.

    Thanks to Alyssa at AlyssaKayle.com for this recipe.

    View Recipe
    sliced baked him with orange glaze on a plate

    Pomegranate Maple Glazed Ham

    Roasted with a sweet and decadent glaze, this ham features flavors of pomegranate, citrus and maple.

    View Recipe
    Maple glazed ham on a serving plate

    Slow Cooker Honey Glazed Ham

    Take the stress out of Easter with this easy-to-make slow cooker ham covered in a honey glaze with brown sugar and cloves.

    View Recipe
    Slow cooker honey glazed ham on a serving platter

    Garlic and Pineapple Glazed Ham

    This ham has maximum flavor with its pineapple, garlic and dijon glaze with notes of brown sugar and cloves.

    View Recipe
    Garlic pineapple ham on a tabletop

    Herb and Citrus Glazed Ham

    Serve up a zesty ham smothered in herbs and fresh citrus for a satisfying sweet and herbaceous flavor.

    View Recipe
    herb citrus rubbed ham in a baking pan

    Dye Your Eggs Naturally

    Share article Dye Your Eggs Naturally on:
    FacebookTwitterPinterestPrint

    Easter’s right around the corner, so skip the egg dye kits this year and go natural! Save time and money by making your own all-natural egg dye using ingredients like fresh berries and spinach straight from your very own kitchen! Egg-cellence is guaranteed.

    Ingredients:

    • Eggs
    • 1 tsp. Salt
    • 2 Tbsp. White vinegar
    For Yellow/Green Dye:
  • 1 cup spinach, chopped

  • For Blue Dye:
  • 1 cup cabbage, chopped

  • For Dark Blue Dye:
  • 1 cup blueberries

  • For Red Dye:
  • 2 cups Beets, chopped

  • For Purple Dye:
  • 1 cup blackberries

  • How to:

    1. Boil eggs and let cool.
    2. Gather the different produce items you’d like to try as a colorant (example: spinach, etc.).
    3. Measure out at least 1 cup of each produce item.
    4. Add 2 cups of water to a pot, and add at least one cup of produce. You will need a separate pot or pan for each colorant.
    5. Bring mixture to a boil and then turn heat down to a simmer for 15 minutes.
    6. Pour through a sieve into a container.
    7. Add 1 Tbsp. of vinegar and stir. If you’re working with kids, let cool before use.
    8. Rub egg with a bit of vinegar with a cloth or paper towel. Place the egg into the container. The longer you leave the egg in, the deeper the color.
    9. Take eggs out of dye and let dry for several hours or overnight before handling.
    Dyed eggs next to produce of the same color
    For extra vibrancy, create a more concentrated dye with more produce and less liquid.
    Shop Now

    Air-chilled Chicken Recipes

    Share article Air-chilled Chicken Recipes on:
    FacebookTwitterPinterestPrint

    We are now proud to carry air-chilled, organic chicken in all stores! With better flavor and texture, our organic air-chilled chicken is tender. The skin is crispy while keeping the chicken incredibly juicy. The air-chilling process is kind to the earth, saving thousands of gallons of water a day.

    Easiest Roasted Chicken

    The Easiest Roasted Chicken 6
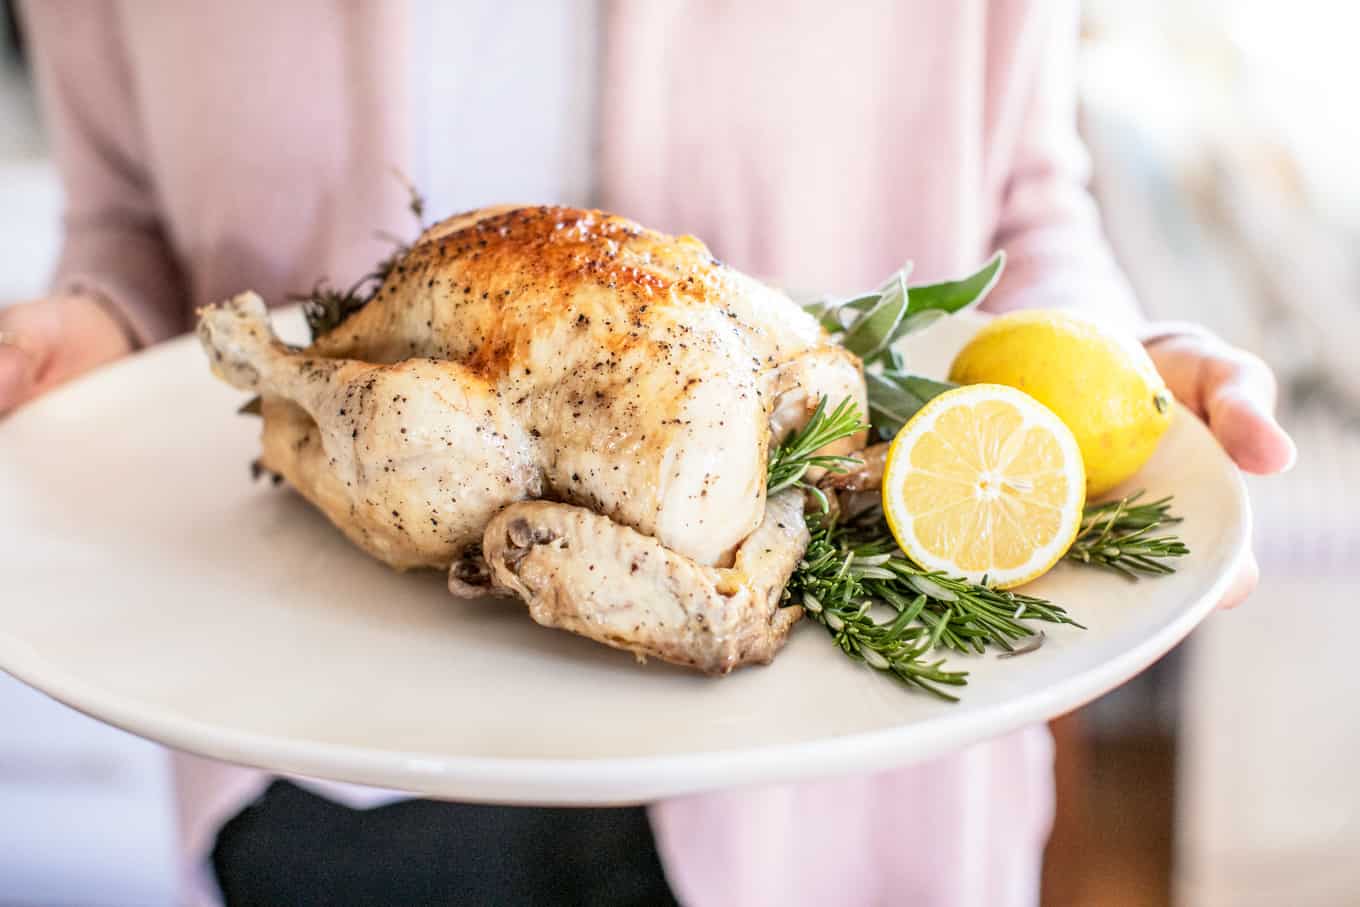
Roasted over a bed of root vegetables for extra flavor, this recipe couldn’t be simpler or more foolproof. Recipe provided by our blogger friend, Molly, at Spices in my DNA. Prep time: 15 minutes Cook time: 80 minutes Serving size: 4

    INGREDIENTS:

    • 3.5 lb. Organic Sprouts Whole Chicken
    • 2 tsp. Sea salt
    • 1 tsp. Ground black pepper
    • 1 Lemon, halved
    • Several sprigs of fresh thyme
    • 1 cup Red potatoes, cubed
    • 1 cup Sweet potatoes, peeled and cubed
    • 1 cup Parsnips, cubed
    • 1 cup Celery root, cubed
    • 1 1/2 tsp. Olive oil
    • 3/4 cup Chicken broth

    INSTRUCTIONS:

    1. Preheat oven to 425°F. Rinse your chicken under cold water and dry very well with paper towels. You want the chicken to be as dry as possible so it develops a crispy crust!
    2. Season the inside of the cavity with a couple pinches of salt and pepper. Rub the outside of the chicken generously with the salt and pepper. Stuff the cavity with the halved lemon and thyme. I like to stuff in half of the lemon, a couple sprigs of thyme, the other half of the lemon, and then the remaining thyme.
    3. Truss the chicken using butcher’s twine. Check out this video on how to truss. Trussing will ensure your chicken cooks evenly.
    4. Place the root vegetables in a heavy, large, oven-safe skillet, like a cast iron. Alternately, you can use a shallow roasting pan or rimmed baking sheet. Toss the vegetables in the olive oil and a couple pinches of salt and pepper.
    5. Arrange vegetables in a single, even layer. Place the trussed chicken on top of the vegetables and pour the chicken broth over the vegetables. Bake for 1 hour 20 minutes to 1 hour 30 minutes, or until outside of the chicken is golden brown and crispy, the meat feels firm when pressed, the juices run clear. If you have a thermometer, the meat near the inner thigh (between the leg and the breast, reads 165°F.
    6. Let chicken rest for 10–15 minutes or so before carving. This ensures a super juicy bird! At this point, I discard the root vegetables. They really serve just as a bed to roast the chicken on, and they provide a lot of flavor to the bird.

    Slow Cooker Garlic Butter Chicken

    Topped with a delicious and easy gravy, this recipe is low-carb and keto-friendly, with Paleo and Whole30® options. Note: You’ll also need aluminum foil, kitchen twine and a pastry brush. Recipe provided by our blogger friend, Cheryl Malik, at 40 Aprons.

    Slow Cooker Garlic Chicken with Gravy Pour

    Prep time: 15 minutes Cook time: 300 minutes Serving size: 4

    INGREDIENTS:

    • 1/4 cup Fresh parsley
    • 3 Garlic cloves, peeled
    • 4 Tbsp. Unsalted butter, softened
    • 1+ tsp. Salt
    • 1 Garlic head, sliced in half crosswise
    • 3-4 lb. Sprouts Organic Whole Chicken, giblets removed
    • 1 Tbsp. Avocado or olive oil
    • 3 Tbsp. Cassava flour
    • 1/2 cup Chicken stock

    INSTRUCTIONS:

    1. For the garlic butter: In a food processor, combine parsley and garlic. Pulse until chopped. Add softened butter and salt and pulse until well combined. Scrape out of food processor into a bowl
    2. For the chicken: Place chicken on a cutting board and pat dry. Remove giblets if necessary. Loosen skin by inserting fingers between the skin and meat, breaking any membranes connecting the skin to the meat.
    3. Stuff garlic butter mixture evenly under skin. Working with 1–2 tablespoons at a time, stick a little mixture under the skin then spread out by pressing on top of the butter with your fingers under the skin or another hand on top of the skin. Repeat until all mixture is evenly used under skin over breast and legs.
    4. Place one half of the garlic inside the chicken cavity.
    5. Tie chicken legs together. Place a long piece of kitchen twine, about 3-feet long, on a surface. Place chicken in the center of the twine right at the top of the thigh. Take both pieces of twine in your hands and bring them down along the seam between the leg and breast. Loop twine inside the end of the leg and around, bringing both ends together and tying very tightly.
    6. Sprinkle chicken with a bit more salt. Create a foil rack and place in the bottom of the slow cooker. Twist a long piece of foil into a rope then shape into a circle, or ball up 3–4 pieces of foil and place in a triangle or square shape in the bottom of the slow cooker. Place remaining half of garlic head in bottom of slow cooker.
    7. Place chicken breast down on top of foil rack and cover. Cook on low heat 4–5 hours or until internal temperature registers 160°F.
    8. Remove ceramic cooker from heating element. Carefully flip the chicken from breast down to breast up. Brush the 1 tablespoon oil all over chicken skin and preheat broiler. Place ceramic cooker in oven about 10 inches from heating element. Watching carefully, broil until skin is evenly browned, then remove from oven.
    9. Remove chicken from cooker and place on a cutting board. Loosely tent with foil to rest. Replace cooker in slow cooker heating element and turn heat to high.
    10. For the gravy: Remove the garlic head from slow cooker. Sprinkle drippings with cassava flour and whisk well until smooth. Add in stock and cook 10–15 minutes. If the mixture does not thicken to your liking, transfer to a saucepan and cook a couple minutes over medium heat, whisking constantly.
    11. Carve chicken and serve with plenty of gravy.

    Flavorful Instant Pot Whole Chicken

    Instant Pot Chicken on PlatterWe love tasty chicken, and we especially love tasty chicken done in under an hour! Grab your instant pot multicooker and have dinner ready in a flash. *Note: for every pound add 6 minutes, for every half a pound add 3 minutes to total cooking time for whole chickens. Recipe provided by our blogger friend, Kate, from Root Revel. Prep time: 10 minutes Cook time: 45 minutes Serving size: 4

    Putting Chicken into Instant Pot

    INGREDIENTS:

    • 3 lbs. Sprouts Organic Whole Chicken
    • 1 Garlic head
    • 1/2 Sweet onion
    • 1/2 Lemon
    • 1 bunch Thyme
    • 1 bunch Rosemary
    • 1 bunch Sage
    • 2 Bay leaves
    • 6 Tbsp. Butter
    • 1 1/2 cups Chicken broth
    • 2 Tbsp. Salted white-truffle ghee

    INSTRUCTIONS:

    1. Liberally salt and pepper the inside of the chicken. Stuff chicken with 1 head garlic, cut in half crosswise, onion, lemon, thyme, rosemary, sage and bay leaves.
    2. Gently loosen the skin from the chicken breast, lifting it from the meat with your fingers and rub about 3 tablespoons of butter under it. Rub 3 more tablespoons of butter all over the chicken surface and season with salt and pepper.
    3. Add a trivet with handles to the instant pot and add chicken broth. Place the chicken on top of the trivet and cover with the lid, lock it, point valve to sealed, press high pressure and set the timer for 20 minutes.
    4. Let the pressure naturally release for 15 minutes, followed by a quick release of the remaining pressure. Remove the chicken and test temp to ensure it’s cooked to 165°F. and place it on a baking sheet, breast side up. Brush 2 tablespoons melted truffle ghee over top of chicken.
    5. Broil for 5–8 minutes, or until skin is golden-brown and crispy. Serve and enjoy!

    Taylor Farms

    Share article Taylor Farms on:
    FacebookTwitterPinterestPrint

    Taylor Farms: Pea pod
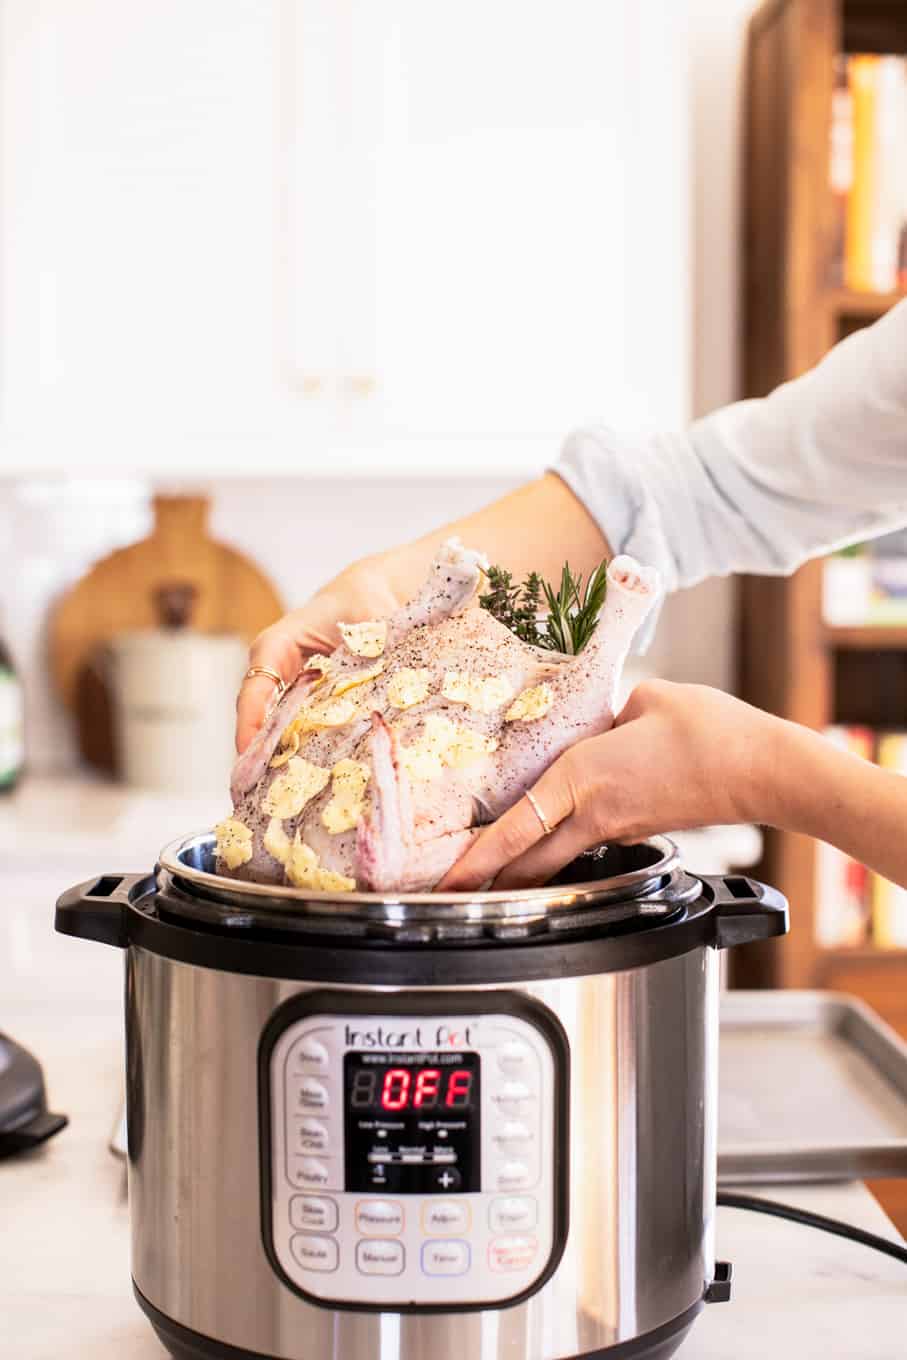
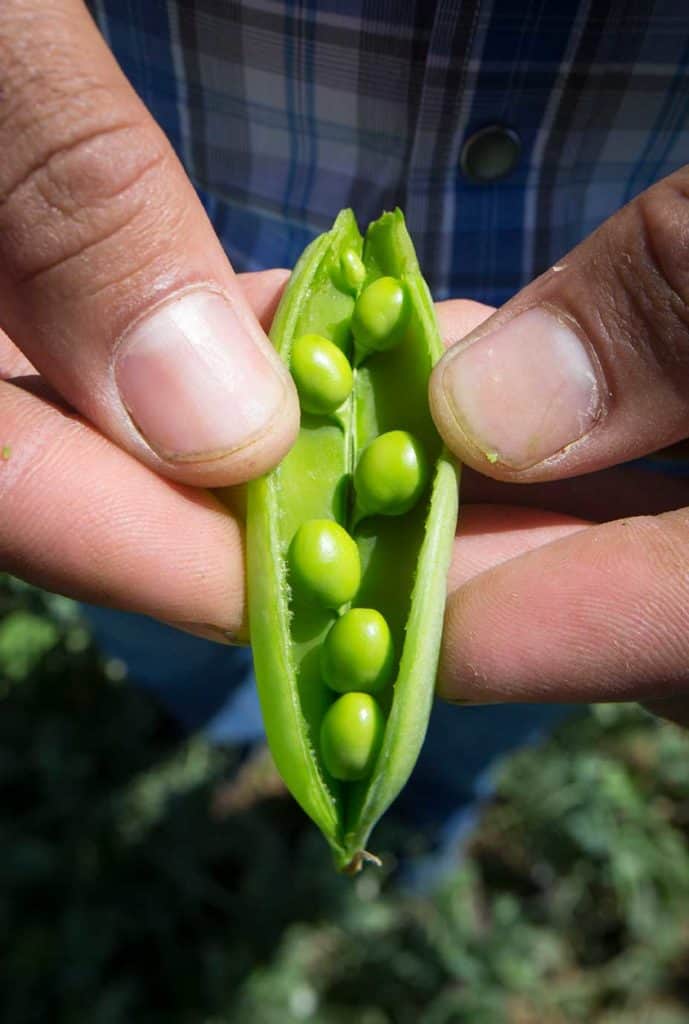
Family owned and operated since 1995, Taylor Farms started in Salinas Valley, California, affectionately called America’s Salad Bowl. As a third-generation produce grower, Bruce Taylor followed in his family’s footsteps to build Taylor Farms into the largest producer of salads and healthy fresh food. Growing high-quality salads and vegetables begins with high-quality farming families and sustainable farming practices.

    Innovation: The Art of Growing

    By pioneering the industry’s first advanced automated harvesters, Taylor Farms increased productivity and provided an ergonomically beneficial environment for employees. From the fields to the processing plants, Taylor Farms continually works to advance industry best practices. They developed SmartWash™, a revolutionary produce wash system that’s helped raise the bar in food safety—keeping your wellbeing a priority.

    Environmental Sustainability

    Taylor Farms is genuinely dedicated to protecting the health of our environment for future generations. Since 2012, Taylor Farms has completed ten major sustainability projects related to alternative and renewable energy, waste reduction and water conservation. With these renewable energy technologies, Taylor Farms has produced 53,326,167 KWh—offsetting 132,755 metric tons of CO2—the equivalent of taking 8,498 cars off the road annually! 

    Thriving Communities

    Giving back has been a part of Taylor Farms’ culture since day one, by sharing their success with the communities in which they live and work. They support their vision to create healthy lives through philanthropic programs focused on youth education and leadership, as well as health and wellness. In the past two years alone, Taylor Farms has donated over six million pounds of fresh produce.

    Their Passion

    From their fields to your fork, Taylor Farms is passionate about making vegetables an exciting and delightful part of your healthy lifestyle. They believe fresh, flavorful greens create the foundation for enjoying vegetables in imaginative and delicious ways.

    Taylor Farms supplies one in three salads across the United States, they even supply our own Sprouts Brand salads and salad kits. We carry a wide variety of their healthy salads and greens for you to choose from.

    SHOP NOW