Self-Care in the New Year

Share article Self-Care in the New Year on:
FacebookTwitterPinterestPrint

Getting a Good Night's Sleep with natural remediesThe New Year is full of big goals and new routines, but you can’t achieve great things if you aren’t taking care of your body and mind. Next time you’re feeling a bit stressed, take a step back and implement some of these self-care tips so you can be your best year-round!

Physical Self-Care

Physical self-care includes all the things that allow your body to function properly. From getting enough sleep to supplementing nutrient deficiencies with vitamins, these all can make a huge impact on your overall well-being. Make sure you’re staying active, fueling your body with proper fruits and veggies, and staying on top of your physical health.

Meditation

Once you have taken care of yourself physically, meditation becomes a great tool to quiet the mind and relax. Often times we have a long to-do list and don’t take the time we need to recharge. Meditation allows you to put the phone away, sit quietly with your thoughts and focus on the moment. Challenge yourself to spend 5 minutes a day with no distractions and focus on your thoughts and taking meaningful, deep breaths.

Establish a Morning Routine

Often times the mornings are chaotic with getting kids dressed and off to school, grabbing coffee and burnt toast and off to work we go! This results in a rush of cortisol to start the day which can leave you feeling sluggish and fatigued later on. Establishing a solid morning routine allows you to set the tone for the day and remain in control of your energy. Start with something as simple as making your bed, then add in a morning stretch or anything else that will help you have a more peaceful day.

Start a Journal

If you haven’t journaled before it can seem overwhelming to put all your thoughts onto paper, but have no fear! By allowing yourself to express and feel your emotions through writing, you won’t bottle up daily stressors that can lead to bigger issues down the road. Start by taking 20 minutes, in the morning or at night, to write anything that comes to mind! If it helps, start by writing about your day and let the pen do the rest. Don’t worry about spelling- just get it all out!

Essential Oils

Aromatherapy is a type of alternative medicine that relies on your powerful sense of smell. When inhaled, essential oils stimulate the olfactory senses and also interact with the respiratory system and brain, especially that part of the brain called the limbic system. Certain essential oils help to promote rest and relaxation, making them a great addition to your self-care tool kit. Get started with these great oils below:
  • Sleep by Everyone Essential Oils
  • Peaceful Sleep from Now® Essential Oils
  • Pillow Potion by Aura Cacia

Pamper Yourself

You deserve it! When life gets stressful, it’s important to take some time for yourself. A great way to do this is by taking a long bath with Epsom salt or a bath bomb, try a DIY Vanilla sugar Scrub, or indulge in your favorite treat like a glass of wine or chocolatey dessert. While these seem so simple, your body and mind will thank you.

Shop Self-Care

Spooky Halloween Pizzas

Share article Spooky Halloween Pizzas on:
FacebookTwitterPinterestPrint

Whether you’re creating a spooky slice before trick-or-treating or a fun and festive Halloween spread, make these decorative pizzas your go-to:   Pizza with ghost shapes

Ghostly Pizza

Ingredients:

  • Plain, or limited-topping frozen pizza (we recommend Caulipower pizza for extra veggies!)
  • Sliced mozzarella cheese
  • Black olives
  • Pizza sauce (optional)
 

Directions:

  1. Bake pizza according to package directions.
  2. Remove pizza from oven.
  3. Spread extra pizza sauce on frozen pizza (optional, to create a spooky, red tone).
  4. Using a ghost-shaped cookie cutter, cut out shapes from cheese.
  5. Slice half of the olives in halves and the rest into small strips, use any leftover to make small dots for ghost eyes and mouth.
  6. Place ghost shapes with olive dots on the pizza.
  7. Place olive halves and strips to give it a spider look.
  8. VPut pizza back in oven for 5 minutes.
 

Vegan Spider Web PizzaPizza with a spider web shape on it

Ingredients:

  • Daiya Cheeze Lover’s Pizza
  • Black olives
  • Miyoko’s Vegan Mozz Ball, cut into small, rectangular strips
  • Pizza sauce (optional)

Directions:

  1. Bake pizza according to package directions.
  2. Remove pizza from oven.
  3. Spread extra pizza sauce on pizza (optional, to create a spooky, red tone).
  4. Slice half of the olives into halves and the rest into small strips.
  5. Place strips of cheese in a spider web design.
  6. Put pizza back in oven for 5 minutes.

Thanksgiving Turkey Snack Sacks

Share article Thanksgiving Turkey Snack Sacks on:
FacebookTwitterPinterestPrint

It’s no secret Southerners love good food and giving thanks. Mix it all together for a healthy and fun holiday food craft.
Thanksgiving snack trail mix

For the Snack Mix

Gobble up a seasonal snack mix from Sprouts bulk bins. Toss together:
  • 1 scoop Dark chocolate-covered pretzels
  • 2 scoops Apple cinnamon granola
  • 3 scoops Cranberry trail mix.
Portion in brown sacks from the paper goods aisle and adorn with handcrafted turkeys.
Snack sack with a cutout paper turkey

Let’s Talk Turkey

Cut heart shapes from craft paper in your school colors. Overlap the hearts a smidgen and secure with tape on the back. Cut 1 1/2-inch rounds from brown paper using a craft punch. Doodle a sweet little turkey mug using a marker. Finish with a holiday saying and attach to the sacks for heart-warming smiles.

Rebecca of Buttermilk Lipstick

About Buttermilk Lipstick

Quite Simply the “Bee’s Knees” of Everyday Living

Rebecca Gordon is a Southern lifestyle expert specializing in food and entertaining. She designed, directed and launched the lifestyle brand, Buttermilk Lipstick which celebrates everyday living from home-cooked recipes, style round-ups and crafts that tie back to her food background and her passion for Southern football and tailgating. Prior to launching Buttermilk Lipstick, Gordon served as Test Kitchen Director for Southern Living magazine and traveled the South as an on-stage presenter with the Southern Living Cooking School, as a Foods and Entertaining Specialist. Rebecca graduated summa cum laude from Johnson and Wales University in Charleston, South Carolina, specializing in Baking and Pastry Arts. She received her undergraduate degree in Restaurant Management from the University of Alabama and gained extensive experience as a pastry chef for many restaurants throughout the South including Frank Stitt’s Highlands Bar and Grill and Bottega restaurants. When she’s not cooking and entertaining friends, you’ll find her gardening or rearranging furniture around her work-in-progress bungalow and, in the fall, cheering on the Alabama Crimson Tide.

No-carve Pumpkins

Share article No-carve Pumpkins on:
FacebookTwitterPinterestPrint

Sometimes pumpkin carving can be a messy, not to mention risky, activity. Rather than skipping out on the Halloween fun, why not try adorning your pumpkin with seeds or adding a splash of color to your festive group of gourds? We’ve rounded up some spook-tacular ways to decorate your pumpkins this season—no knife required!

Marbled PumpkinsMarbled Pumpkin

What you’ll need:

  • Small pumpkin, any color
  • Bowl of room-temperature water
  • Variety of nail polish
  • Toothpicks
   

Directions:

  1. After choosing your colors, pour the nail polish into bowl as close to the water as possible to avoid the polish sinking down to the bottom of the bowl.
  2. Swirl the nail polish colors together slightly using a toothpick.
  3. Stick the pumpkin on a fork and dip the top of it into the bowl.
  4. Slowly remove and set on paper to dry (about 20 minutes).
 

Pushpin PumpkinPushpin Pumpkin

What you’ll need:

  • Pushpins/thumb tacks
  • Pumpkin of any size
     

Directions:

  1. Using a pencil, lightly draw your design onto your pumpkin.
  2. Push in pins along the lines of the design.
  3. Optional: adorn with a bow.
 

Embellished PumpkinEmbellished Pumpkin

What you’ll need:

  • Assortment of seeds, jewels, or other decorative items
  • Craft glue or hot glue gun
  • Pumpkin, any size
     

Directions:

  1. Using your decorative items, plan out your design on a flat surface.
  2. Begin gluing your design onto your pumpkin and let dry.

Weekly Meal Prep Made Easy

Share article Weekly Meal Prep Made Easy on:
FacebookTwitterPinterestPrint

Weekly Meal Prep There are a lot of benefits to meal prepping in order to create multiple meals or snacks for the upcoming week. It can reduce stress, save time and money, and help you and your loved ones eat a little healthier, too.

Where to Start: How to Meal Prep

Start small so you don’t feel overwhelmed. Picking something easier like snacks or breakfasts as a place to start your meal prep practice means you’re more apt to continue the new routine. Once you get the hang of it, you’ll be ready to take your meal prep to the next level adding lunches and dinners. Two super-easy make-ahead breakfasts you can try are overnight oats or chia pudding—both are packed with protein and nutrients.

Prepping Your Meals

The beauty of prepping is all the time you will save. In most cases, you can make multiple meals in about the same amount of time it takes to make just one. And, while you’re planning meals, think of those that can be frozen and reheated later. Making more than usual will leave you with dinners you can freeze and use when you’re in a pinch. Cooking a big batch of rice, portioning into freezer bags and freezing it is a great way to shave cooking time off weeknight meals for a fast stir-fry, fried rice or simple side dish. You’ll thank yourself later for thinking ahead now! 

Planned Overs

This practice is another way to ease your way into meal prep. When you’re making the evening meal, simply make extra. You can pack up the leftovers in reusable containers to save for the next day or freeze for later. Try making extra taco toppings for dinner and turn them into taco salads for the next day’s lunch. A few corn chips in a resealable baggie can be crumbled on top just before eating to create a satisfying crunch.

Put a Lid on It

If you don’t already have a big stash of various-sized reusable containers, you’ll want to stock up. Having both glass and plastic containers, as well as resealable bags means you’ll have just the right-sized container for everything from full dinners to individual-sized meals—that too will save you time!

Remember …

There is no right way to meal prep. Whether you opt to prepare and freeze multiple slow-cooker meals in resealable bags to use later in the month, make lunches for several days at a time or anything in between, any meal prep you do before your week begins will save you time and stress later. Have fun with it! Once you get the hang of it, you’ll wonder why you didn’t start sooner.

Weekly Meal Planning

Share article Weekly Meal Planning on:
FacebookTwitterPinterestPrint

It can be difficult to maintain your healthiest lifestyle when the pace of your schedule picks up.  Sometimes, it seems easier to go for what’s more convenient rather than what’s healthy. Planning your meals in advance can not only save you time during the week, it can also save you money and stress. We’ve put together a simple guide to creating your meal plan for the week. Weekly Meal Planning

Healthy Meal Planning Steps

Before you go grocery shopping, it helps to have a game plan. Set aside about an hour or so to create your weekly strategy. There are a number of ways to get started! You’ll find dozens of deals in your local Sprouts’ weekly flyer, the digital weekly flyer is only a click away. A super-easy way to find deals, coupons and even create a shopping list is with our app—it’s available for both the Apple and Android, so you can easily download it on your smartphone! It’s simple to save money when you plan around sales.

Make a List

Now you’re ready to start filling in your weekly meal plan. If using your smartphone to create a list isn’t your thing, you can print off a copy of our handy meal planning template and start filling in your meals and snacks. Whether you choose digital or analog, a great way to begin planning the week’s meals is with your family’s favorites, filling in around those days you usually serve a certain dinner. Similarly, you’ll want to add any special meals, like birthdays or friends joining you. Stumped on what to have for breakfast, pack for lunch or make for dinner? We have tons of great recipes here!.

Shopping with Ease

One of the most frustrating parts about grocery shopping can be bouncing from department to department looking for all the items on your shopping list. When you make your list, break it down by department, grouping like items together. This approach allows you to check off all the items on the list before moving on to the next department—your weekly shopping will be done in no time! (Our weekly meal-planning guide is great because it includes a shopping list which is already divided by department for you.)

Did you know?

The average American household throws out 25% of their groceries—meal planning can help cut down on food waste!

What Can Be Composted?

Share article What Can Be Composted? on:
FacebookTwitterPinterestPrint

  Compost Components: person holding dirt with sprouting plant

Did you know?

Composting improves soil’s ability to retain water, which may help you save money on the water bill!


Aerobic Bacteria vs. Anaerobic Bacteria

Composting can be a carefully curated cast of characters. True, it’s easy enough to pile your leftover fruit and veggie kitchen scraps in with lawn clippings and leaves to create a basic compost. That will yield results—eventually. But if you’re interested in attaining some DIY soil a little more quickly, or curious to know more, here are some of the key characters you’ll want to become familiar with in order to direct the best production.

The Cast of Characters

  • Compost Heroes: Aerobic Bacteria

    These little powerhouses are the star of the show. They need oxygen (aerobic) to help break down all the matter you put in your compost bin. To create nutrient-rich matter in a timely manner, you need the right environment to encourage a healthy population of these good guys.
  • The Baddies: Anaerobic Bacteria

    These guys steal the scene when the pile has gotten compacted and has little to no air flow. Because they thrive in an airless environment (anaerobic), they have the power to overwhelm the population of the aerobic bacteria. A burgeoning population of anaerobic bacteria can bring composting to a near standstill.
  • Browns: Carbonaceous Matter

    Carbon-rich matter, or browns as they’re also known, are like the carbs in the diet of those good-guy bacteria. Think of browns like the colors they often are: dried grass cuttings, dried leaves, sawdust and shredded newspaper.
  • Greens: Nitrogen-Rich Matter

    Those hero bacteria also need to consume protein—enter the nitrogen-rich matter, or greens. These are your kitchen scraps from fruits and veggies, as well as things like coffee grounds (and your coffee filters, though technically, they are a brown) and green grass clippings.
  • Water

    Water stars as herself in this mellow-drama. You’ll need the right amount of moisture to ensure your good-guy bacteria neither drown nor dehydrate.
  • Pitchfork

    This character enters to stir things up when the plot … uh, compost thickens.

Use Your Nose

Properly tended, compost does not smell! Rather, it does not smell bad—it should smell rich and earthy. Here are some troubleshooting tips if your compost develops an unsavory scent. An ammonia odor means you have too much nitrogen-rich, green matter. Adding some browns to the pile, like shredded newspaper, dried leaves or straw, and giving it a swirl with the pitchfork should help immensely. Also, compost that has been layered, but not turned recently can emit this eye-watering aroma. Smells like sulfurous rotting eggs? If the pile is too damp or has become too compacted the result is a distinctive undesirable odor. If it’s been layered too tightly, simply turning the pile may alleviate the odorific problem. If it’s too wet, adding some carbonaceous materials and turning the pile will help give our compost heroes, the aerobic bacteria, a chance to breathe and thrive.

Happy Ending

Our bacterial heroes require a proper ratio of green/nitrogen-rich to brown/carbonaceous matter or N:C. This proportion can be anywhere from 50:50 to 20:80 depending on environmental conditions and how quickly you want your pile to become useable. Additionally, they are living organisms and require a balance of air and water which you’ll achieve by turning the pile (aeration) and occasionally watering it if it becomes too dry. Ultimately, your compost pile should look like dirt when it’s done, with an earthy smell (not like decayed, rotted food) and you shouldn’t be able to recognize any of the matter you added to it earlier.

Did you know?

The rapid composting method, also known as the Berkeley Method, can effectively create compost in as little as 14 days!

Cookie Ice Cream Bowl

Share article Cookie Ice Cream Bowl on:
FacebookTwitterPinterestPrint

  Give into that sweet tooth craving- thank us later. Pile on scoops of gelato for a sweet, melt-in-your-mouth kind of bite. This is a fun way to get kids involved with cooking and an even better way to save time on dish washing, because you’ll be eating the bowl!

Ingredients:

Tools needed:

  • Wooden spoon
  • Mixing bowl
  • Set of measuring spoons
  • Mixer (optional)
  • Muffin tin
  • Cooking spray
  • 5-inch round disk cookie cutter

Instructions:

  1. Preheat oven to 350 degrees F
  2. Using a hand mixer or wooden spoon, blend butter until smooth. Add egg and Organic Chocolate Chippy Cookie Mix and continue blending mixture until dough is formed.
  3. Grease bottom of muffin tin. Roll out dough on floured surface to 1/3 inch thickness. Cut 5-inch round disks from dough. Cover one disk over the bottom of each muffin tin, pressing to form smooth surface.
  4. Bake for 10-12 minutes, or until edges are golden brown.
  5. Cool on pan for 10 minutes, then carefully loosen bottom edges of cookies from pan using spatula. Allow cups to cool completely on wire cooling rack.
  6. Fill up cookie cups with Sprouts Organic Vanilla Gelato, and drizzle with your favorite chocolate sauce. Enjoy!

How to Start Composting

Share article How to Start Composting on:
FacebookTwitterPinterestPrint

Did you know there is a difference between soil and dirt? Soil is nutrient-rich because it contains microorganisms, decaying organic matter, earthworms and other helpful insects. Dirt lacks all of those nourishing and living things. Even earthworms will not thrive in dirt—composting to the rescue! You can turn your dirt into soil with these composting steps.
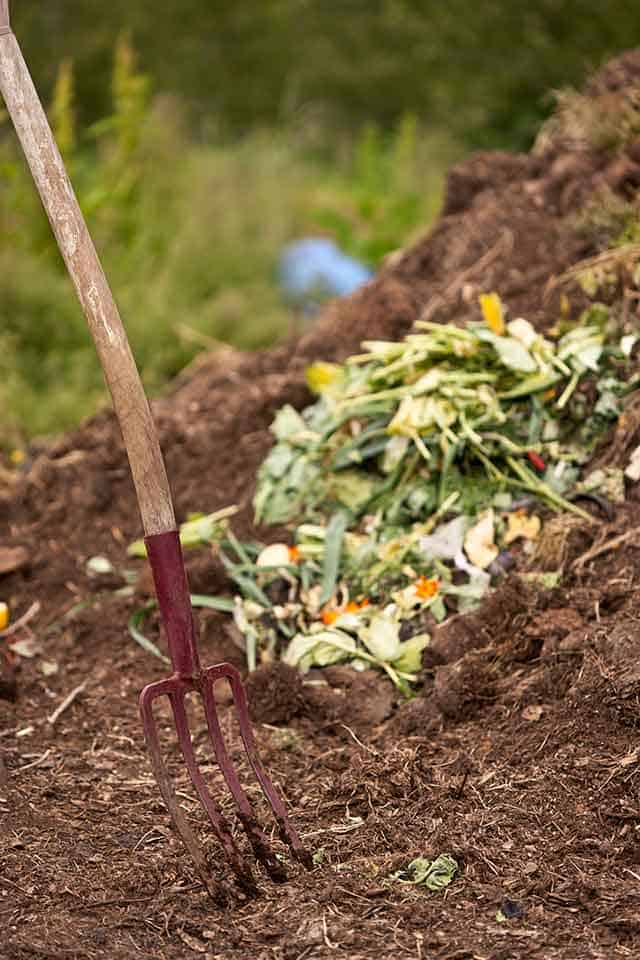
How to Start Composting: composting in the back yardWhat is Compost?

Compost is a mixture of decaying organic material that helps to fertilize soil. At its simplest form, you can easily make compost by taking your vegetable-based kitchen scraps and yard waste like leaves and grass, putting them in a pile, and letting nature decompose it into nutrient-rich fertilizer for your house plants, garden or plants in your yard.

1. Pile vs. Bin

Decide whether you’re a super-DIYer and want to build a place for a compost pile in your yard or you’d rather use a bin. There are loads of simple plans for containing a compost pile online as well as various types of compost bins. Choose whichever best suits you.

2. Placement

You’ll want to find a spot in your yard to place your composting bin or pile. Ideally, this spot is not too sunny and easy to access from your kitchen. (The easier it is, the more apt you’ll be to continue your new composting routine!)

3. Save up Stuff

You’ve got your bin or pile space all situated and ready to go, now’s the time to rake your yard for dried leaves to use as the base of your pile. You’ll also want to start saving kitchen scraps of veggies and fruits. (Remember, no animal products can make their way into your compost pile!)

4. Layering

Ideally, you’ll want to have about three times as much dried matter to the wetter fruit and veggie scraps from your kitchen. Put down the dried matter first, then add your kitchen scraps on top. Add a layer of soil and a little water to moisten and there you have it—your beginning compost pile!

5. Turning

You’ll need to turn your compost from time to time. Also, if it is dry, give it a little water. If it smells, it has too much water, add some crushed leaves (not more kitchen scraps), turn it and that should do the trick! If it’s really dry, it needs to be turned and watered, or add more fruit and vegetable scraps.

6. Ready to Use

You’ll know your compost is ready to use when it looks like dark rich soil. Add it to your houseplants or garden—they’ll love you and so will the environment! Tip: Crushing or shredding your dried yard leaves and cutting your kitchen scraps into smaller pieces will help your compost turn into usable compost more quickly.

Did you know?

Crushed egg shells are the only exception to the no-animal products rule in composting. Including them in your compost pile adds calcium—an important nutrient in helping plants build cell walls!
Composting 101

Share article Composting 101 on:
FacebookTwitterPinterestPrint

The Why

Nourishing to your plants, the environment and even your own wellbeing, composting is a pretty easy and straightforward endeavor. The EPA reports food and yard waste make up 20–30% of what we throw away. When those food and yard scraps make their way into the landfill, they break down anaerobically (without oxygen) and release methane. The less of this greenhouse gas we are able to produce, the better for the environment. Knowing you’re making a difference by utilizing those scraps to feed your plants and help the environment is good for you too!

Compost Video

Video Description: Creating & maintaining a compost pile is easy, here’s the 411 on how you can get started!

What If You Don’t Garden?

Even if you don’t garden in what you might think of as the traditional sense by growing your own fruits and vegetables, you might have a yard full of plants that could benefit from the extra nutrients in your DIY soil. Even without a yard, there are still plenty of things to do with your compost. If you have houseplants, they’ll benefit from the extra nutrients. Local schools may have garden programs and would welcome compost, likewise for community or urban gardens in your neighborhood. If you like the idea of composting but don’t have space to dedicate to it, look for a curbside composting service in your area. These kinds of services usually provide the bins and all the education you’ll need to get composting quickly!

How to Get Started Composting

You can learn how to start composting in our article Composting: How-to Basics. You’ll find even more details and helpful tips in our article Composting Cast of Characters.

Did you know?

Methane gas is 30 times more potent than CO2 (carbon dioxide), another greenhouse gas.