Every year you face the same dilemma: What should I get for my loved ones? What did I get them last year? And, of course, can I get away with a simple gift card?
We recommend making something crafted with love by your very own hands. It’s easier than you think, and in the end, it really is the thought that counts.
Even if you haven’t attempted a handmade gift since that stunning Crayola family portrait a few decades ago, there is hope this holiday season. Admittedly, some of it comes from the Internet, where anything is seemingly possible; but we’ve unearthed a few good handcrafted gift ideas that seem both charming and simple.

Herb-Infused Olive Oil
Add a little spice to plain old olive oil. Infused olive oils are perfect for sautéeing your favorite vegetables, as a dressing, or drizzled on freshly cooked hot pasta with a sprinkling of Parmesan cheese. They also look pretty snazzy just sitting there in the bottle, if you get some of the cool bottles from The Container Store.
Here’s how: Stuff a handful of herbs in decorative, food-safe bottles, preferably with a rubber stopper, and add oil. Try chile peppers for a kick, or rosemary for a classic taste. Adorn the bottles with pretty ribbon and a label describing what’s inside. Please Note: If fresh herbs are used, then the oil must be stored in a cool dry place (in the refrigerator for garlic) and used within a week to avoid spoilage and possible illness. The safest bet is to use fresh herbs that have been washed and then completely dried in a food dehydrator until all moisture is gone.
Make it even more special: Pair with a bottle of fine balsamic vinegar and a few of your favorite olive oil recipes.
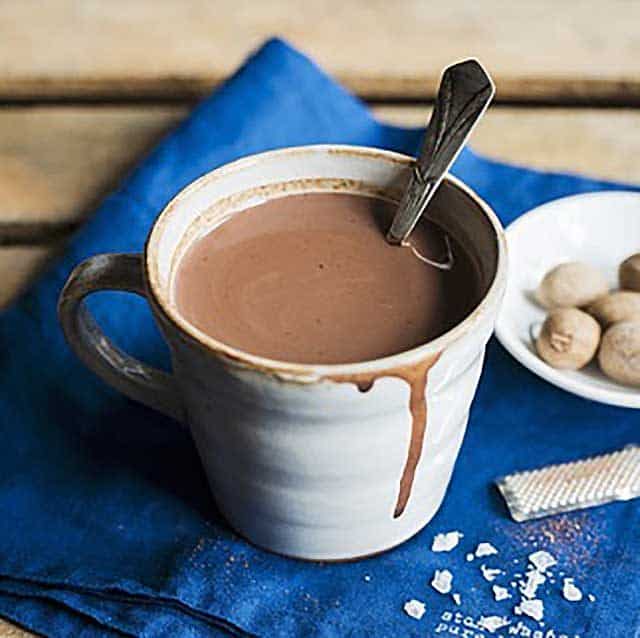
Aztec Hot Chocolate
Nothing says comfort like a steaming mug of hot chocolate on a chilly winter’s night. Kick up the volume with this exotic twist on classic cocoa, guaranteed to toast your tootsies.
Here’s how: In a bowl, combine 1/2 cup dark cocoa powder, 3/4 cup superfine sugar, 1/2 teaspoon vanilla powder (found in the Bulk spice area), 1/2 teaspoon ancho chile powder, 1/4 teaspoon chipotle powder, and 1/2 teaspoon cinnamon. Transfer mix into a small container or a cellophane bag and attach with a note to mix 2-3 tablespoons with 1 cup of hot water or milk.
Make it even more special: Tuck the cocoa into a BPA-free travel mug with a few cinnamon sticks bundled with a bow.
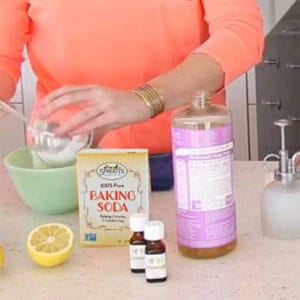
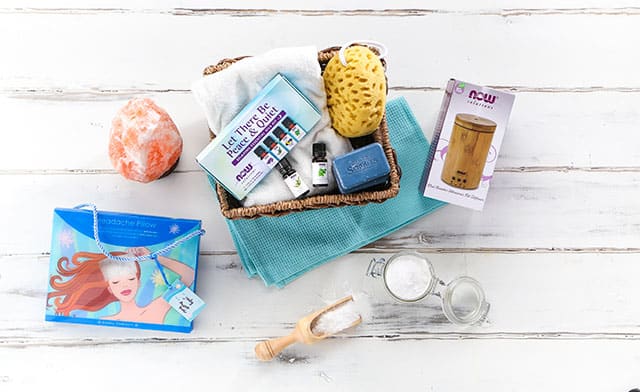
Scented Bath Salts
In the little corner of the store we like to call “HBA” (Health and Body Care), you’ll find everything you need to give the gift of relaxation in a warm bath. Measure three cups of Epsom salt into a large plastic Ziploc storage bag. Add 10-15 drops of your choice of 100 percent pure essential oil. (Popular options include eucalyptus, which is clarifying, and lavender, which is calming; but Sprouts has many to choose from.) Shake, squeeze, and massage bag vigorously to mix the salts and oil. Package the scented salts in a pretty glass jar with a lid. Be sure to print up some labels to mark the scents.
Make it even more special: Consider gifting the bath salts with an inflatable bath pillow and a few votive candles in a matching scent.
If handmade gifts are not your speed, Sprouts still has you covered for inexpensive yet thoughtful items guaranteed to produce a smile. You might find books and CDs, organic cotton gifts, scented sachets, and always, always, lots of vino (remember, when you buy any six bottles, mix and match, you get a free wine carrier—a great excuse to play the “one for you and two for me” game!).
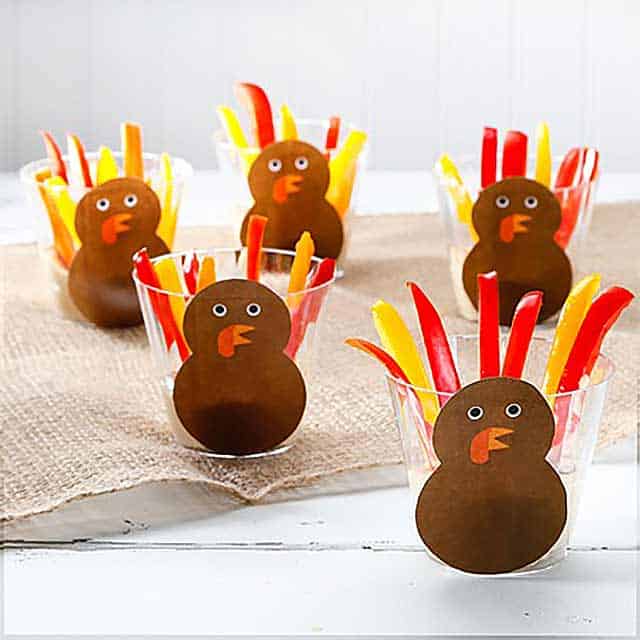 Prepping Thanksgiving dinner can be tough—especially when little ones are involved. Creating an entire Thanksgiving spread and getting your kiddos to eat this balanced meal is a feat to feel thankful for when achieved.
Luckily, we’ve got a kid-approved snack that’s easy to make and fun to eat! Kids will love that these adorable turkey cups are just for them and you’ll love knowing this snack is packed full of good-for-you ingredients.
Prepping Thanksgiving dinner can be tough—especially when little ones are involved. Creating an entire Thanksgiving spread and getting your kiddos to eat this balanced meal is a feat to feel thankful for when achieved.
Luckily, we’ve got a kid-approved snack that’s easy to make and fun to eat! Kids will love that these adorable turkey cups are just for them and you’ll love knowing this snack is packed full of good-for-you ingredients.
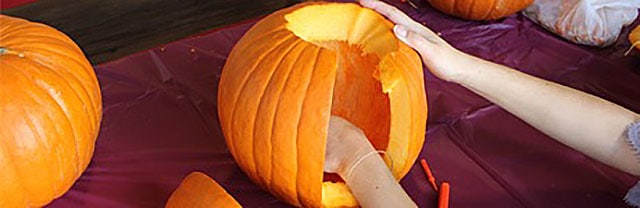 Before the designing begins, carve a trench out of your pumpkin. Not only will this help to clean it out, but you’ll also be set when it’s time to place a candle inside and put it on display.
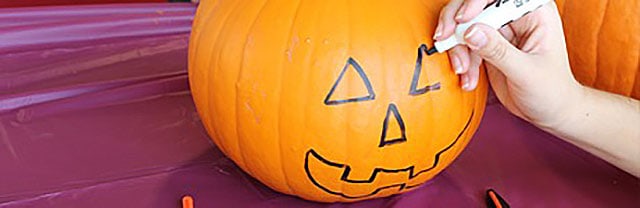 Use a dry erase marker to draw out a design on your pumpkin. Unlike a permanent marker, you’ll be able to erase any mistakes before carving your masterpiece!
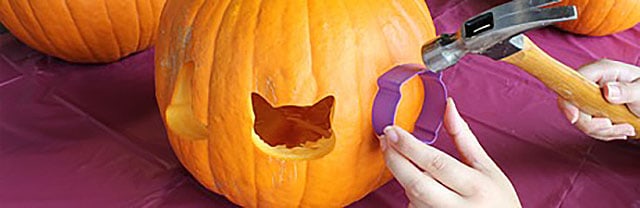 Hammers and cookie cutters may not be conventional tools for pumpkin carving but don’t knock it until you try it! Using both will help make cleaner lines on the pumpkin and ultimately result in a cleaner carving. Kiddos will love seeing their favorite shapes on their pumpkin, too!
 Place a tea-light candle in a small glass votive to avoid any fire hazards. Lighting your pumpkin with battery-powered tea lights is another safe option.
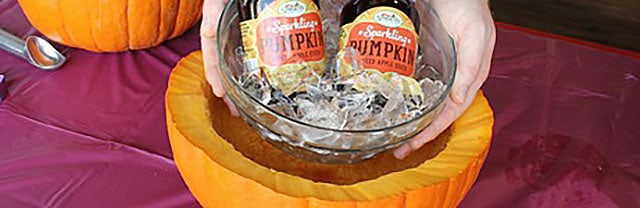 New uses for pumpkins! For a fun addition to a holiday spread, you can also carve out half the pumpkin and place a bowl inside for serving snacks and drinks.
 Remember the options are limitless! You can also use a watermelon or pineapple to create a new twist on the classic jack-o’-lantern. In these versions, you get an after-carving snack!
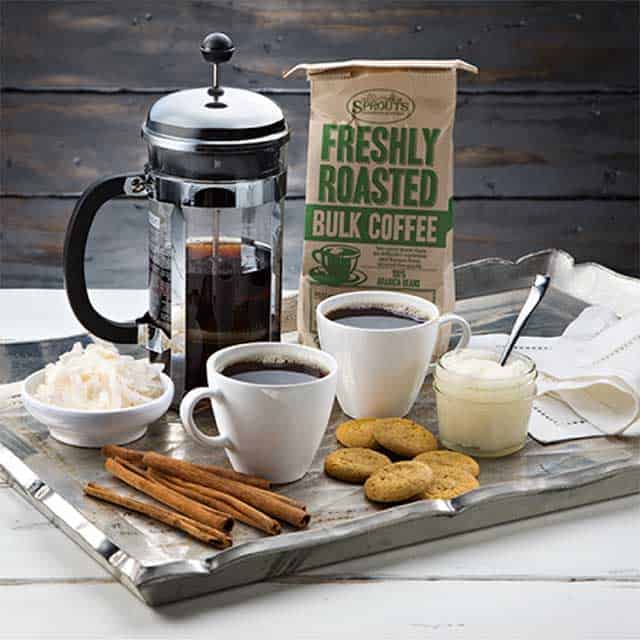 “I’m going to be productive, efficient and amazing today.” These are the words of a person with a strong coffee in hand.
Just because your coffee keeps you on track, doesn’t mean you can’t have some fun with it. Easily add some variety by doctoring the flavor, and enjoying with add-ins. Here are ideas we’ve been brewing up:
“I’m going to be productive, efficient and amazing today.” These are the words of a person with a strong coffee in hand.
Just because your coffee keeps you on track, doesn’t mean you can’t have some fun with it. Easily add some variety by doctoring the flavor, and enjoying with add-ins. Here are ideas we’ve been brewing up: