Egg-ucation

Share article Egg-ucation on:
FacebookTwitterPinterestPrint

What Does Your Egg Carton Label Mean?

Eggs may only come in one shape, but Sprouts has numerous options to choose from. How can you be sure you’re making an egg-ucated decision about the type, size and color? Animal welfare is of the utmost importance to Sprouts, and we hold both our suppliers and ourselves to high standards in regard to supply chain transparency. All of our egg suppliers are required to meet or exceed USDA Food Safety and Inspection Services Standards, and any cage-free supplier must also meet or exceed animal welfare standards such as Certified Humane certification criteria outlined by Humane Farm Animal Care, among other nationally recognized programs.

EGG CARTON TERMS

Pasture Raised

The HFAC’s Certified Humane® requirement is 1,000 birds per 2.5 acres (108 sq. ft. per bird) and the fields must be rotated. The hens must be outdoors year-round, and have mobile or fixed housing where they can go inside at night for protection from predators. They can also be housed indoors for up to two weeks due to inclement weather.

Free Range

This label is regulated by the USDA and indicates that the flock was provided shelter in a building, room or area with unlimited access to food, fresh water and continuous access to the outdoors during their production cycle. The outdoor area may or may not be fenced and/or covered with netting-like material.

Cage Free

This label indicates that the flock was able to freely roam in a building, room or enclosed area with unlimited access to food and fresh water during their production cycle.

Organic

The organic standards describe the specific requirements that must be verified by a USDA-accredited certifying agent before products can be labeled USDA Organic. Overall, organic operations must demonstrate that they are protecting natural resources, conserving biodiversity and using only approved substances. Organic eggs come from chickens treated with the same animal welfare standards as free-range and are given non-GMO feed.

Pasteurized

This label indicates eggs were heated in a sanitary facility under the supervision of the USDA. In pasteurization, the liquid part of the egg is rapidly heated and held at a minimum required temperature for a specific amount of time. This destroys salmonella, but does not cook the eggs or affect color, flavor or nutritional value. By law, all liquid eggs must be pasteurized.

Omega-3 or DHA

These are from hens that have been fed a diet supplemented by a source of omega-3 fatty acids (typically from flax seed).

No Added Hormones

A similar claim includes “Raised without Hormones.” Federal regulations have never permitted hormones or steroids in poultry, pork or goat.

White or Brown

Color is not a reflection of quality and is not a factor in the U.S. Standards, Grades, and Weight Classes for Shell Eggs. Eggs are simply sorted for color and marketed as either “white” or “brown” eggs. It is common that brown eggs are bigger in size, which is usually due to the breed of chicken laying the eggs. For this reason, brown eggs cost more to produce and are typically found at a higher price point.  

Freezer-to-Table Recipes

Share article Freezer-to-Table Recipes on:
FacebookTwitterPinterestPrint

As the days get longer, so do schedules. These five recipes use frozen foods to create weeknight meals that come together exceptionally quick. You probably already have some of the ingredients in your freezer—why not give these recipes a try? BUILD YOUR SHOPPING LIST ORDER FOR DELIVERY

Shrimp Zoodle Pad Thai 

created by our blogger friend, Nichole Crews, at Casa De Crews

Light, fresh and perfect for lunch or dinner        

Cheesy Garlic Shrimp and Mushroom Pizza

created by our blogger friend, Kaylee, at Lemons and Basil

Gluten-free and piled high with caramelized onions, seasoned mushrooms, fresh mozzarella and Parmesan          

Cauliflower Rice & Chicken Taco Skillet

created by our blogger friend, Emily Dixon, at One Lovely Life

A flavorful, one-pan dinner that comes together in under 30 minutes          

Creamy Chicken Tortilla Soup

created by our blogger friend, Jennie, at One Sweet Mess

Loaded with bold flavor, warm spices and creamy cheese       Frozen Veggie Stir Fry

Frozen Veggies Stir Fry with Noodles

created by our blogger friend, Ericka, at Nibbles and Feasts

Serve as a main dish or hearty, veggie-filled appetizer

Popcorn 5 Ways

Share article Popcorn 5 Ways on:
FacebookTwitterPinterestPrint

Whether you like it sweet or savory, these snack-worthy popcorn recipes by our blogger friends will have you reaching for more:

Lemon White Chocolate Popcorn by The Nutrition Adventure:

Lemon White Chocolate Popcorn

Ingredients:

  • 1 bag Sprouts Salted Microwave Popcorn
  • 3/4 cup White chocolate chips
  • ¼ tsp. Canola oil
  • 1 Tbsp. Grated lemon zest

Instructions:

  1. Pop microwave popcorn according to package directions. Place popcorn into a large mixing bowl, removing any unpopped kernels.
  2. Place white chocolate chips into a microwave-safe bowl and heat for 25-30 seconds intervals, stirring in between. Be careful to not overheat the chocolate. Stir in canola oil, mixing well.
  3. Pour one-third of the melted chocolate over the popcorn and mix. Repeat this two more times until all chocolate is used.
  4. Once the popcorn is coated, pour onto a large baking sheet. Sprinkle lemon zest over popcorn, evenly distributing.
  5. Spread the popcorn out into a single, even layer and allow to dry for about 2 hours.

Stovetop Spicy PopcornSpicy Paprika, Rosemary, & Garlic Stovetop Popcorn by Beautiful Eats and Things:

Ingredients:

  • ½ cup Sprouts Popcorn Kernels
  • ¼ cup Oil
  • 1 and ½ Tbsp. Garlic powder
  • 2 Tbsp. Sprouts Grund Paprika
  • ½ tsp. Sprouts Cayenne Pepper
  • 2 sprigs of fresh rosemary, minced
  • Salt to taste

Instructions:

  1. In a large, thick-bottomed pot, heat ¼ cup of oil on medium to high heat.
  2. Add 1 and ½ tablespoons of garlic powder and ½ cup Sprouts Popcorn Kernels to the pot. Stir and make sure that the kernels form an even layer on the bottom of the pot. Cover with lid.
  3. As the kernels pop, shake the pot a couple of times to help prevent burning.
  4. When the popping starts to slow down, remove from heat and keep covered.
  5. In a small bowl, mix 2 tablespoons of Sprouts Paprika, ½ teaspoon of Sprouts Cayenne Pepper, and minced rosemary. Sprinkle over popcorn and toss.
  6. Season with salt to taste and enjoy!

Bacon Cherry Popcorn Nutty Cherry & Bacon Popcorn by Milk & Honey Nutrition:

Ingredients:

  • 1/2 cup popcorn kernels
  • 2 Tbsp. Avocado oil
  • 6oz. Uncured bacon
  • 1/2 cup Sprouts Organic Cherry Fruit Spread
  • 1/2 cup Almond butter
  • 1 cup raw cashews (optional)

Instructions:

  1. Heat the avocado oil over medium high heat, in a large pot on the stove. Add 3-4 popcorn kernels to the pot and cover with the lid. As soon as one of the kernels has popped, add the rest of the kernels. Slightly tilt the lid to vent the steam and shake occasionally until all the kernels are popping 2-3 seconds apart. Transfer the popcorn to a bowl and set aside. Don’t wash the pot just yet, you’ll use it again a bit later on. (Alternatively, you can use a store bought bag of popcorn. You’ll need about 15 cups of popcorn.)
  2. Assemble a baking rack on top of a sheet pan with edges. Spread the uncooked bacon pieces on top of the rack, making sure they aren’t touching each other. Cook the bacon until slightly crispy following the package instructions for time and temperature setting. Set the bacon aside and let it cool, then chop it up into bite size pieces.
  3. Place the pot you popped the popcorn in back on the stove, and begin to heat it over medium heat. Add the fruit spread and almond butter to the pan and stir constantly until the mixture is hot and almost bubbling (about 5-6 minutes). Remove it from the heat.
  4. Spread the popcorn into an even layer on a parchment lined baking sheet. (Be sure to use. baking sheets with edges/sides.) Spoon the almond butter and cherry fruit spread mixture onto the popcorn and carefully toss and mix the popcorn to make sure the popcorn is evenly coated. (Note: You can also do this in a bowl or bag separately and then spread the coated popcorn out onto the parchment lined pan.) Sprinkle the chopped up bacon and cashews evenly over the popcorn.
  5. Bake on 225 degrees for 40 minutes, stirring every 10 minutes. Remove the popcorn from the oven and let it cool completely. Enjoy!

Churro PopcornCinnamon Churro Popcorn by One Lovely Life:

Ingredients:

  • 8 cups Popped popcorn (from about 1/3 cup un-popped Sprouts Organic Popcorn Kernels) – see instructions for how to pop popcorn.
  • 3 Tbsp. Butter or vegan butter
  • 4 Tbsp. Coconut sugar or Sprouts brown sugar
  • ½ tsp. Sprouts Organic Ground Cinnamon
  • ½ tsp. Sprouts organic vanilla extract
  • Pinch salt

Instructions:

  1. Preheat the oven to 300 degrees F and line a baking sheet with parchment paper.
  2. Pop your popcorn. Put half of the un-popped popcorn kernels (about 2 ½ Tbsp. kernels) in a paper lunch sack and fold the top over twice.
  3. Place bag fold side down in the microwave and microwave on HIGH power for 2 minutes.
  4. Remove from microwave and let cool slightly before pouring out into a large bowl.
  5. Repeat with remaining un-popped kernels. (You can re-use the bag)
  6. Sort out and discard any remaining un-popped kernels from the popped popcorn.
  7. Meanwhile, make the butter and sugar mixture. Gently melt 3 Tbsp. butter and 4 Tbsp coconut sugar over low heat in a small saucepan, just until sugar is dissolved and the mixture comes together.
  8. Add ½ tsp. ground cinnamon and ½ tsp. vanilla extract to the butter/sugar mixture. Stir to combine. (Mixture will be fairly thick). Let cool for 1 minute or so.
  9. Pour butter/sugar mixture over the popped popcorn and stir with a spatula to coat the popcorn well. Sprinkle with a pinch of salt.
  10. Pour coated popcorn onto your prepared baking sheet and bake at 300 degrees F. for 10 minutes, stirring every 3-4 minutes for even cooking.
  11. Let cool before serving.

Sweet and Salty PopcornSweet and Salty Popcorn Snack Mix by The Speckled Palate:
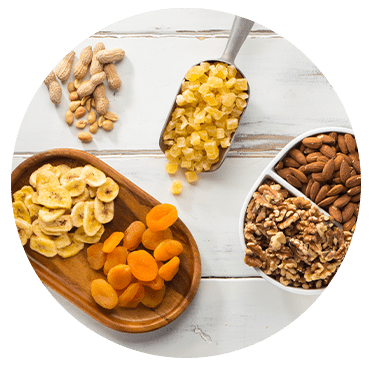
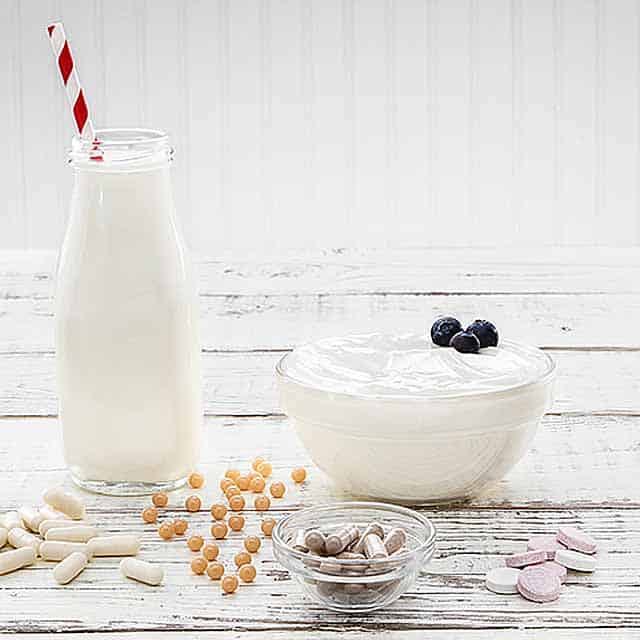
Ingredients:

  • 4 oz. Sprouts Organic Popcorn, Lightly Buttered flavor
  • 1 ½ cups Sprouts Mini Twist Pretzels
  • 1 cup Dark Chocolate Pretzels
  • 1 cup Wild West Roasted and Salted Trail Mix
  • ½ cup 85% Dark chocolate almonds with sea salt
  • ½ cup Red Tart Cherries

Instructions:

  1. In a large bowl, pour in the Sprouts Organic Popcorn.
  2. Add the Sprouts Mini Twist Pretzels, Dark Chocolate Pretzels, Wild West Roasted and Salted Trail Mix, 85% dark chocolate almonds with sea salt and Red Tart Cherries.
  3. Toss until combined.
  4. Serve in bowls or popcorn bags.

What Are Prebiotics?

Share article What Are Prebiotics? on:
FacebookTwitterPinterestPrint

Though they often get a bad rap, some bacteria are beneficial. Good bacteria you’ve likely heard of include probiotics—microbes that help to digest food and support a healthy gut environment called a microbiome. Just like we can’t exist without eating, neither can probiotics. That’s where prebiotics come in. Think of prebiotics as the buffet for the healthy gut bacteria. Found in foods, prebiotics help the growth of good gut bacteria by providing nourishment for them. It’s likely you’re already consuming prebiotics, they’re the fiber in some vegetables and grains.

What are prebiotics, asparagusPrebiotic Foods

Inulin is a soluble fiber found in plants. Because of its molecular make-up, inulin cannot be digested by your small intestine—that’s how it continues on to your large intestine to become fuel for beneficial bacteria. If you read food labels, you may have seen inulin listed, that’s because it is added as a source of fiber in things like nutritional bars, yogurt and baked goods. (Chicory root is a major source of inulin and you may have seen that listed in the ingredients as well.) Here are some veggies that contain inulin fiber:
  • Asparagus
  • Garlic
  • Jicama
  • Onions
  • Leeks
Other foods that contain prebiotic fiber include:
  • Barley
  • Bananas
  • Oats
  • Apples
  • Flaxseeds
  • Wheat bran
  • Seaweed

Ready to get more prebiotic-packed foods in your diet? SHOP NOW

Health Benefits of Citrus Fruits and Juices

Share article Health Benefits of Citrus Fruits and Juices on:
FacebookTwitterPinterestPrint

by Mary Ellen Phipps, MPH, RDN, LD founder of milkandhoneynutrition.com

We are springing into a new season where the flowers start to bloom, and the air is getting warmer. Citrus fruits are the perfect way to add extra brightness to the season and give you the healthy boost you need as the season changes. Citrus fruits include: sweet oranges, mandarins, lemons, limes, grapefruit, and a few other lesser known varieties. Not only do they offer delicious taste, but their vibrant colors can brighten up any dish or beverage. You’ll find a huge variety of citrus at your local Sprouts Farmers Market. In addition to their great taste and pretty colors, they also come loaded with an abundance of health benefits.
Health Benefits of Citrus Fruits and Juices

Nutrients Found in Citrus Fruits

Likely the most well-known nutrient in citrus fruits is vitamin C, which can be found in all citrus fruits. In fact, just one medium orange or grapefruit provides 100% of your daily vitamin C needs. Citrus fruits also contain the B vitamins thiamin, niacin and B6. And potassium, an electrolyte essential for human health, is found in citrus fruits, along with phosphorus and magnesium. Other nutrients to make note of in citrus fruits include antioxidants such as flavonoids and carotenoids.

Potential Health Benefits of Citrus Fruits

Given the powerhouse of nutrients found in citrus fruits, it’s no surprise that there are a lot of potential health benefits when it comes to citrus and their (no-added-sugar) juice counterparts.

Heart Health

Several of the nutrients found in citrus fruits help support a healthy heart and cardiovascular system. Specifically: vitamin C, soluble fiber and flavonoids. In addition, multiple studies have found lower rates of heart disease in people who consume higher amounts of citrus fruits as part of an overall balanced diet. Both the fruits themselves and juices have been found to have positive effects on heart health when consumed in appropriate amounts.

Cancer Risk Reduction

Numerous studies have found that citrus fruits and the nutrients they contain may offer protection against certain types of cancer including: lung, esophageal, breast, stomach and pancreatic cancers. This is likely due to antioxidant activity (certain types of both flavonoids and carotenoids can act as antioxidants) to inhibit cancer growth and repair cell damage, as well as the fiber content. Diets higher in fiber are associated with lower cancer rates.

Brain Health

Some research has shown that citrus fruits may protect our brains against inflammatory conditions like Alzheimer’s and Parkinson’s. Flavonoids (specifically hesperidin), found in abundance in citrus fruits, may slow the rate of deterioration, while also delaying the onset of these conditions.

Bone Health

Vitamin C, potassium and magnesium (all found in citrus fruits) play an important role in bone structure, density and strength. And while calcium and vitamin D aren’t found naturally in large amounts in citrus fruits, the vitamin C content of citrus fruits can help increase the amount of calcium and vitamin D we are able to absorb from other foods. This why 100% orange juice is sometimes fortified with calcium and vitamin D.

Kidney Health

People who eat less citrus fruits tend to have higher rates of kidney stones. One type of kidney stone is caused by low levels of citrate in urine. Consuming citrus fruits can help raise the levels of citrate in urine, and thus may help decrease the risk of developing kidney stones.

Iron Absorption

It is hard for our bodies to absorb all of the iron we consume in food. In fact, it’s impossible. Depending on the source of the iron, our bodies will only absorb about 14–18% of the iron in our foods, but consuming vitamin C (which is found in large amounts in citrus foods) at the same time can increase the amount of iron your body is able to absorb.

Immune System Support

Many citrus fruits are in season in the winter time, which also happens to be the heart of cold and flu season. Consuming citrus fruits and juices can increase your intake of vitamin C, flavonoids and carotenoids which help support healthy immune systems by fighting inflammation and helping your body’s cells communicate with each other.

Skin Health

Citrus fruits and juices can improve skin health because of their high vitamin C content. Vitamin C helps protect our body’s cells from damage, and even helps the cells repair themselves. People who consume more vitamin C may have a lower risk of skin damage from the sun (though you should always wear sunscreen!). Your body also uses vitamin C to build collagen which improves skin elasticity and tone.

Respiratory Health

Several studies have linked the symptoms associated with asthma and citrus fruit consumption. Both Both vitamin C and flavonoids, may play a role in decreasing the frequency of asthma attacks and/or improving its symptoms.

Diabetes Prevention and Management

Believe it or not, eating fruit is not bad for people with diabetes and it does not increase your risk for diabetes. Studies have shown over and over that people who eat a diet rich in fruits and vegetables, specifically those higher in vitamin C and fiber, have a lower risk of diabetes. It also should be noted that vitamin C is a powerful antioxidant and may help prevent or reduce the amount if inflammation present in people with diabetes. So, whether it’s a grapefruit, lemon, tangerine or glass of 100% orange juice, rest assured you’ll do your body some good by reaching for those citrus fruits the next time you’re in the Sprouts Produce Department!
Please note: The information contained in this article is not intended to treat, cure, or diagnose any medical condition and should not be treated as such. Please seek out your physician or dietitian before making changes to your diet.
 
Influencer - Mary Ellen - Milk & Honey Nutrition

About Mary Ellen

Mary Ellen Phipps, MPH, RDN, LD, is the Registered Dietitian, mom, food blogger and recipe developer behind milkandhoneynutrition.com. She’s also a type 1 diabetic and firmly believes food should bring us joy, not stress. Mary Ellen makes healthy eating easy, realistic and most importantly … fun! Visit her website and you’ll find yummy low-sugar, diabetes-friendly recipes the whole family will love … as well as helpful tips and a little mom humor.

milk & honey nutrition logo

What is Fair Trade?

Share article What is Fair Trade? on:
FacebookTwitterPinterestPrint

Fair Trade coffee beans with farmer
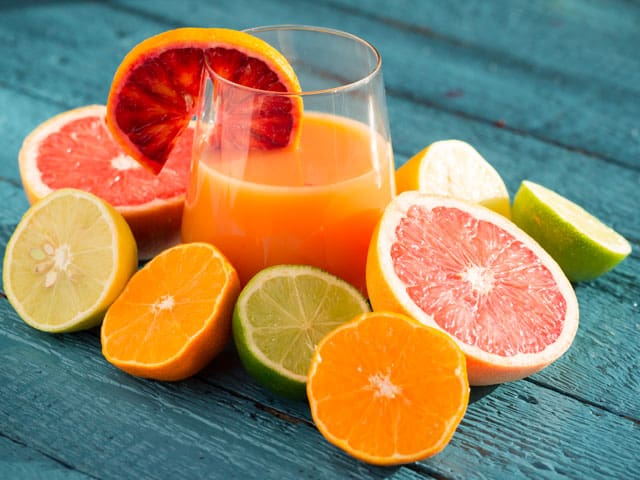
As a consumer, every purchase you make is a vote within the market place. You have the ability to influence not only which products you see on shelves, but also where those products come from and how they’re made. When you choose fair trade products and ingredients, you help improve the lives of farmers, farm-workers, producers and their families. You’ll also be making an eco-friendly choice.

10 Principles of Fair Trade Products*

The ten principles of fair trade help to create a model of sustainable, ethical trade that puts people and planet first. Purchasing dedicated fair trade brands is the easiest way to do the most good, every day.
  1. Opportunities for disadvantaged producers
  2. Transparency & accountability
  3. Fair trade practices
  4. Fair payment
  5. No child labor, no forced labor
  6. No discrimination, gender equity, freedom of association
  7. Good working conditions
  8. Capacity building
  9. Promote fair trade
  10. Respect for the environment
*Courtesy of the World Fair Trade Organization website.

Keep an eye out for these fair trade logos …

Fair Trade logos to look out for  

Did you know?

The Fair Trade movement started in the United States in 1946. You can read more about the history of the fair trade movement on the World Fair Trade Organization website.

Eat the Rainbow

Share article Eat the Rainbow on:
FacebookTwitterPinterestPrint

by Kristina LaRue, RD, CSSD, founder of love & zest Do you have intentions of adding more fruits and veggies into your diet throughout 2019? Maybe you’re focusing on plant-based eating habits for the new year and need some inspiration! Whether you’re a produce connoisseur or you’re new to the idea of eating a variety of fruits and veggies, eating the rainbow is always a good idea. Since February is a month of love, we’re going to hone in on red fruits and vegetables! Fortunately, Sprouts has all the red produce you need to incorporate into your day-to-day healthy living routine.

Eat the Rainbow with red fruits and vegetables
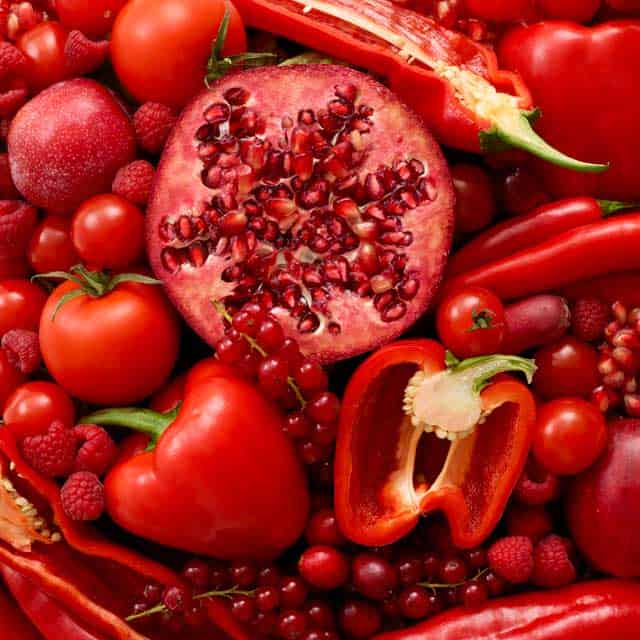
Let’s Start with Red Fruits

Apples are a great and versatile option. They’re high in fiber and a high-quality source of vitamin C. There are also a number of choices when it comes to red apples—Pink Lady, Honeycrisp, Gala, Fuji, Red Delicious, Ambrosia—the list goes on! If you’re obsessed with apples, check out this refreshing recipe for Apple Crunch Slaw with Almond Butter Dressing. Cranberries contain a substantial amount of fiber, vitamin C and manganese. They make for a convenient and nutritious snack, a tasty addition to any salad and add a hint of sweetness to your oatmeal. Cherries are bursting with fiber and vitamin C. The options are endless when it comes to different ways to enjoy cherries. Try them in sweet and juicy desserts, as well as savory dishes such as salads and appetizers. Since Valentine’s Day is near, be sure to try this Double Chocolate Cherry Skillet Brownie. Raspberries are packed with many nutrients including fiber, vitamin K, magnesium, vitamin C and manganese. They’re perfect for a midday snack, a tasty salad dressing, flavorful boost to oatmeal and a refreshing addition to water. Strawberries are a very good source of fiber, vitamin C and manganese. A versatile fruit, they’re great in salads, pancakes, fruit pizza, yogurt popsicles and by themselves—you simply can’t go wrong with them.  

Now for the Red Veggies

Beets are an incredible source of dietary fiber, folate, potassium and manganese. A highly nutritious vegetable, they have a sweet and earthy flavor. Try roasting them, topping a salad with them or pairing them with apples and goat cheese—you won’t regret it! Red bell peppers are a popular and versatile pepper that can be incorporated into any dish. They’re great diced up in an omelette for breakfast, sliced on top of a salad for lunch, and grilled or roasted as a side for dinner. You’ll get a boost of dietary fiber, vitamins A, C, E and B6, as well as folate from this nutritious veggie! Red onions are a staple veggie for many. If you’re new to red onions, you may never go back to yellow or white! Packed with flavor and vitamin C, red onions can enhance any dish with flavor and nutrients. They pair perfectly with salads, on top of burgers, and roasted with balsamic vinegar for a side dish bursting with flavor. Red potatoes are always a good idea. Create a simple side dish by roasting some red potatoes in olive oil, salt, pepper and garlic for the perfect combination. They can also be used in a potato salad using plain Greek yogurt and your favorite seasonings. Rhubarb can be enjoyed in more ways than just pie! Loaded with many nutrients including fiber, vitamins C and K, calcium, potassium, and manganese, rhubarb is an intensely tart spring vegetable that tastes amazing in a fruit smoothie too! Tomatoes can be enjoyed simply by slicing and adding salt and pepper on top. They also make a perfect soup for chilly weather or a refreshing addition to a cucumber and feta salad in the summer months. They’re a very good source of dietary fiber, vitamins A, C and K, potassium and manganese. Remember to eat the rainbow every day, and this year make Valentine’s day festive with red produce!  
 
Kristina portrait from Love and Zest

About Kristina

Kristina LaRue, RD, CSSD, is the owner of popular food and nutrition website, Love & Zest, where she shares (mostly) healthy recipes to fuel the whole family and real-life stories of modern motherhood. Kristina is a former NBA team dietitian, collegiate sports RD and cookbook author. She’s the mama to two active and hungry boys and lives in Orlando with her middle-school sweetheart. Follow Love & Zest on love & zest’s Instagram, love & zest’s Pinterest and love & zest’s Facebook, and get her new family-friendly weeknight dinner guide for stress-free meal planning.

love & zest logo

Top 9: Powerful Probiotic Foods

Share article Top 9: Powerful Probiotic Foods on:
FacebookTwitterPinterestPrint

Bacteria have a reputation for causing disease, so the idea of tossing down a few billion a day for your health might seem—literally and figuratively—hard to swallow. But a growing body of scientific evidence suggests that you can treat and even prevent some illnesses with foods and supplements containing certain kinds of live bacteria. More people are starting to consume these beneficial microorganisms, called probiotics (from pro and biota, meaning “for life”).

Yogurt:

One of the most popular probiotic foods is live-cultured yogurt, but be sure to read the ingredients list, as not all yogurts are made equally. Look for brands such as Brown Cow, which include lactobacillus, acidophilus and other probiotic cultures.

Kefir:

Similar to yogurt, this fermented dairy product is a unique combination of milk and fermented kefir grains. It has a slightly acidic and tart flavor with a hint of bready-yeastiness (but that is usually more noticed in the smell than the taste). Kefir is similar to yogurt, but because it is fermented with yeast and more bacteria, the final product has more probiotics. Glass bottle of milk, yogurt and vitamins

Sauerkraut:

Made from fermented cabbage and other veggies, sauerkraut is not only extremely rich in healthy live cultures, but also aids in reducing allergy symptoms. Sauerkraut—and the similar but spicy Korean dish, kimchi—is also loaded with immune-boosting vitamins that may help ward off infection.

Soft Cheese:

Goat’s milk and soft cheese are particularly high in probiotics, including thermophillus, bifudus, bulgaricus and acidophilus.

Dark Chocolate:

Probiotics can be added to high-quality dark chocolate, up to four times the amount of probiotics as many forms of dairy. This is only one of the health benefits of chocolate.

Miso Soup:

Miso is one the main-stays of Japanese traditional medicine that can really get your digestive system moving. Made from fermented rye, beans, rice or barley, adding a tablespoon of miso to some hot water makes an excellent, quick, probiotic-rich soup, full of lactobacilli and bifidus bacteria. Beyond its important live cultures, miso is extremely nutrient-dense.

Pickles:

Believe it or not, the common green pickle is an excellent food source of probiotics. When looking to pickles for probiotics, opt for naturally fermented varieties where vinegar wasn’t used in the pickling process. A sea salt and water solution encourages the growth of beneficial bacteria and may give sour pickles some digestive benefits.

Tempeh:

A great substitute for meat or tofu, tempeh is a probiotic-rich grain made from fermented soy beans. A great source of vitamin B-12, this vegetarian food can be sautéed, baked or eaten crumbled on salads. If prepared correctly, tempeh is also very low in salt, which makes it an ideal choice for those on a low-sodium diet.

Kombucha:

An acquired taste due to its sour flavor and fermented odor, kombucha has been around for more than 2,000 years and has a rich anecdotal history of preventing and fighting cancer, arthritis and other degenerative diseases. In fact, according to a Los Angeles Times article, people with HIV made kombucha popular in the 1980s. People drank it to boost their immune systems, increase energy, improve their skin and nails and strengthen thinning hair. These health benefits have not been scientifically proven. However, research shows antioxidant properties in kombucha help boost immunity and energy levels. As a probiotic beverage, it may improve digestion.

Ready to try some of these delicious, good-for-you foods? SHOP NOW

Touchdown Wings for the Big Game

Share article Touchdown Wings for the Big Game on:
FacebookTwitterPinterestPrint

You can’t spell wing without “win”! Our blogger friends put together five delicious wing recipes that are sure to score big points on game day.

Asian BBQ Wings by Nourish Nutrition Blog

These Asian BBQ wings have a spicy, crisp outside and flavor, tender inside—that you and your guests will love. Prep time: 5 minutes Cook time: 25 minutes Serves: 4

INGREDIENTS:

  • 2 lbs. Sprouts Butcher Shop Chicken Wings
  • 1 cup Water
  • 1/4 cup Sprouts Organic Asian BBQ Sauce, plus more for dipping
  • 1/4 cup Mayonnaise
  • 1+ Tbsp. Sriracha, or more depending on desired spice level
  • 1 Tbsp. Sesame seeds
   

DIRECTIONS:

  1. Pour water into the bowl of an instant pot, then place chicken wings in steamer basket of instant pot. Close lid, and set vent to sealing. Set to manual, and cook for 10 minutes, at high pressure. It should take about 20 minutes from start to finish.
  2. Once wings are done, turn vent to venting setting and let pressure release, once steam stops, remove lid.
  3. Just prior to serving, set oven to broil. Remove chicken wings and place on a lined baking sheet, slather wings with BBQ sauce, and broil for just 2–3 minutes.
  4. While wings are in the oven, mix together mayonnaise and Sriracha in a dipping bowl, and pour more BBQ sauce into another dipping bowl.
  5. Transfer hot chicken wings from baking sheet to serving bowl, sprinkle with sesame seeds and enjoy.

Vegan Thai Spicy Buffalo Wings by The Vegan Caveman

Made from seitan, these spicy Thai-inspired wings boast a special kick from the homemade Buffalo sauce. You won’t want to stop eating ’em! Brush on extra sauce for more flavor. Optional: serve with vegan ranch. Prep time: 15 minutes Cook time: 75 minutes Serves: 4

INGREDIENTS:

For the seitan wings: 
  • 1 cup Vital wheat gluten 
  • 3 Tbsp. Brown rice flour 
  • 1 Tbsp. Nutritional yeast 
  • 1/2 Tbsp. Onion powder
  • 1/2 tsp. Dried thyme 
  • 1/2 tsp. Dried basil 
  • 1/2 tsp. Dried oregano 
  • 1/2 tsp. Smoked paprika 
  • 1/4 tsp. Coriander 
  • 1/2 tsp. Old Bay seasoning
  • 1/2 tsp. Garlic powder 
  • 1/4 tsp. White pepper 
  • 1/4 tsp. Salt 
  • 1/2 cup Warm water 
  • 2 Tbsp. Liquid aminos (sub soy sauce) 
  • 8 cups Low-sodium organic vegetable broth 
  • 3 Garlic cloves 
Vegan-Thai-Spicy-Buffalo-Wings1 Vegan-Thai-Spicy-Buffalo-Wings 
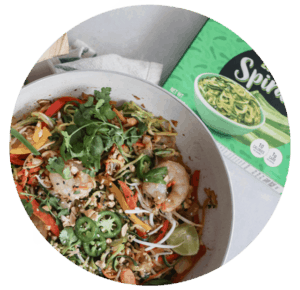
For the Thai Buffalo sauce: 
  • 2 Flax eggs (2 tbsp. flax meal + 5 tbsp. warm water, set for 10 minutes) 
  • 1/2 cup Buffalo sauce (vegan) 
  • 2 Tbsp. Red wine vinegar 
  • 2 Tbsp. Liquid aminos (or soy sauce) 
  • 1 Tbsp. Coconut sugar (or cane sugar) 
  • 1/2 Lime, juiced 
  • 1 Garlic clove, minced 
  • 1 dash Pepper and salt
Other: 
  • 1/2 cup Brown rice flour 
  • 1/2 cup All-purpose flour 
  • 1/2 tsp. Black pepper 
  • 2 Tbsp. Vegan butter 
  • Green onions, thinly sliced, optional, to serve 
  • Vegan ranch, optional, to serve 

DIRECTIONS:

Note: The following directions will be given for stand mixer and without on each step. 
  1. Using a stand mixer, mix together the vital wheat gluten, brown rice flour, nutritional yeast, onion powder, dried thyme, dried basil, dried oregano, smoked paprika, coriander, Old Bay, garlic powder, white pepper and salt with a paddle attachment on low speed until well mixed. If no stand mixer, mix with a wooden spoon till well blended. 
  2. While mixer runs on low, add in 1/2 cup warm water and 2 tablespoons liquid aminos. If using bowl, continue stirring with wooden spoon while adding water and aminos. 
  3. Change the paddle for the dough hook on stand mixer if using. 
  4. Run the dough hook on low for 10 minutes to knead the dough, add in another 2 tablespoons of warm water, and run on low for another 10 minutes. If not using a stand mixer, once well mixed with a wooden spoon, pour the mixture onto a flour-lined surface. Knead the dough with hands for about 8–10 minutes until it becomes elastic-like and can be pulled apart without breaking. 
  5. Once done with mixer or kneading, form into 10–12 small wings.
  6. In a large soup pot, bring the 8 cups of broth and 3 garlic cloves to a boil over medium-high heat. 
  7. Add the wings to the boiling broth and reduce heat to medium. Simmer for 60 minutes until wings double in size. 
  8. While the wings cook, mix together all ingredients for the Thai Buffalo sauce in a small bowl. Additionally, in a shallow bowl or plate, mix 1/2 cup brown rice flour, 1/2 cup all-purpose flour, and 1 teaspoon black pepper. 
  9. Once wings are done cooking, drained and cooled for a few minutes, dredge in the flour/pepper mixture until well coated. Set on a plate.
  10.   Add 2 tablespoons vegan butter to a large frying pan. When the butter starts to pop, dip the dredged wing in the Thai Buffalo sauce and lay on the pan. Repeat until all wings are complete. Flip after 1–2 minutes when the wings start to brown. I like a little burn on my wings as it adds a nice smoky char. Once browned on both sides, set on paper-towel-lined plate.
  11.  Using a pastry brush or spoon, brush the rest of the Buffalo sauce on the wings. Serve and enjoy!

Air Fryer Sweet Chili & Onion Wings by Beautiful Eats and Things

Get your air fryer ready! The sweetness from the honey and the spiciness from the cayenne pepper are two bold flavors that are perfect for kick-off-ready wings.  Prep time: 15 minutes Cook time: 30-40 minutes Serves: 4 Air Fryer Sweet Chili & Onion Wings

INGREDIENTS:

    • lb. Sprouts Butcher Shop raw chicken wings 
    • 2 tsp. Sprouts Cayenne Pepper 
    • 2 tsp. Sprouts Paprika 
    • 1 1/2 Tbsp. Sprouts Raw Unfiltered Honey 
    • 1 Tbsp. Oil 
    • 1 pkt. Mild chili seasoning 
    • 1 pkt. French onion dip seasoning 
    • Salt and pepper, to taste

DIRECTIONS:

  1.  Place wings in a large bowl and add oil, honey and all seasonings.
  2. Combine until all ingredients are distributed evenly. Cover and let sit for about 10 minutes. 
  3. Spray air fryer basket with cooking spray and place chicken wings in basket. Cook at 380°F for 25 minutes, shaking the basket every 5–10 minutes. 
  4. After 25 minutes, increase the temperature to 400°F and cook for 10–15 minutes longer. Shake every 5 minutes and begin checking for doneness at 5 minutes.  
  5. Remove when the wings are crisped to your liking and enjoy!

Brown Sugar BBQ Wings by Spices in my DNA

Brown sugar adds a classic sweetness to traditional BBQ wings. Because this recipe calls for ketchup as the base, the seasonings can be easily altered to your liking. The wings are made extra hot and crunchy from the oven, so no extra oil here! Prep time: 20 minutes Cook time: 40 minutes Serves: 4 Brown Sugar BBQ Wings

INGREDIENTS:

For the wings: 
  • 2 lbs. Sprouts Butcher Shop chicken wings 
  • 1 tsp. Salt 
  • 2 tsp. Baking powder 
  • Nonstick cooking spray 
Brown Sugar BBQ Wings1For the sauce: 
  • 1 1/2 cups Sprouts Ketchup 
  • 1/2 cup Sprouts Light Brown Sugar, loosely packed 
  • 1/4 cup Water 
  • 1 Tbsp. Molasses 
  • 1 Tbsp. Honey 
  • 2 Tbsp. Apple cider vinegar 
  • 1 tsp. Worcestershire sauce 
  • 2 tsp. Dijon mustard 
  • 1 tsp. Paprika
  • 1 tsp. Garlic powder 
  • 1 tsp. Onion powder 
  • 1/2 tsp. Sprouts Dry Mustard 
  • 1/2 tsp. Salt 
  • 1/2 tsp. Pepper

DIRECTIONS:

  1. Pat wings dry with paper towels. Place wings in a large, non-reactive glass or plastic bowl. Add the salt and toss to coat. Sprinkle the baking powder over the wings and toss again to coat. Place in the fridge for at least 4 hours or up to overnight. (This step helps the wings get super crispy when they’re baked!) 
  2. Preheat oven to 450℉. Spray a large, rimmed baking sheet with nonstick spray. Set aside. Evenly layer the wings on the baking sheet, and bake for 20 minutes, then flip them, and bake for another 15–20 minutes or until golden and crispy. 
  3. While wings are baking, in a medium saucepan, combine all ingredients for the BBQ sauce. Bring to a boil over medium-high heat, then reduce to medium-low and simmer for 10 minutes, stirring frequently. Season to taste with additional salt and pepper if desired. 
  4. When wings are finished baking, add to a large bowl along with ½–¾ cup (or desired amount) of BBQ sauce and toss to coat! The amount is totally up to you and how saucy you want them! (You will have extra sauce leftover for another use.) Serve immediately with extra BBQ sauce and enjoy.

Grilled Cajun Wings by Cake ‘N’ Knife

These wings are grilled and great! With a cayenne-spiked hot sauce, it won’t just be the heat from the grill you’re feeling. Prep time: 10 minutes Cook time: 40 minutes Serves: 6

Grilled Cajun Wings

INGREDIENTS:

  • 4 lbs. Sprouts Butcher Shop chicken wings, broken down into drumettes and flats
For the rub:
  • Tbsp. Baking powder 
  • tsp. Paprika 
  • tsp. Garlic powder 
  • tsp. Onion powder 
  • tsp. Dried thyme 
  • 1/2 tsp. Dried oregano 
  • 1/2 tsp. Kosher salt 
  • 1/2 tsp. Freshly ground black pepper 
  • 1/4 tsp. Cayenne pepper
For the sauce:
  • Tbsp. Butter, melted 
  • Tbsp. Hot sauce (I used Buffalo-style hot sauce, but you can use your favorite kind) 
  • 1/4 cup Honey 
  • 1/2 tsp, Cajun spice mix (reserved from above) 
  • tsp. Apple cider vinegar 
  • Tbsp. Worcestershire sauce 
  • Fresh parsley for garnish 

DIRECTIONS:

  1. In a small bowl, mix together paprika, garlic powder, onion powder, thyme, oregano, salt, pepper and cayenne. Set aside 1/2 teaspoon of the mixture. Mix in baking powder with the majority of the spice mix.
  2. Pat chicken wings dry with paper towels. Place in a large bowl and sprinkle with majority of the Cajun seasoning. Toss to coat. Place on a wire rack on a baking sheet lined with aluminum foil. Refrigerate for 8 hours.
  3. Grill wings skin-side up for 30–35 minutes, covered and over indirect heat. 
  4. While the wings are grilling, make the sauce. Whisk together butter, hot sauce, honey, Cajun spice rub, apple cider vinegar, and Worcestershire sauce. Brush the wings with the sauce and cook an additional 5 minutes, covered. 
  5. Add the remaining sauce to a large bowl and toss the wings in the sauce. Add the wings to a serving bowl or platter and sprinkle with parsley before serving. 

The Party Platter that WINGS the Big Game by Honeysuckle

Video Description: The Party Platter that WINGS the Big Game | The Big Game is here so make sure to have an Epic Chicken Wings Platter from Sprouts!

7 Ways to Avoid a Blood Sugar Crash

Share article 7 Ways to Avoid a Blood Sugar Crash on:
FacebookTwitterPinterestPrint

Fuel your best life!

Healthy food bowl to avoid blood sugar crash Whether you’re sitting at your desk, chasing the kids around or just enjoying the day, we’ve all experienced that sudden “I need a nap” feeling out of nowhere. What causes this? And what can you do to avoid it? For a lot of people, that sudden feeling of exhaustion can be related to low blood sugar levels. Most of our energy levels throughout the day are directly tied to our blood glucose, aka blood sugar, levels. Rapid changes in your blood sugar, both up and down, can leave you feeling like you need a nap.

Balanced meals and snacks with the right foods, can help prevent this. A blood sugar-friendly meal or snack should have three things:
  • Protein
  • Fat
  • Fiber
All three of these things act as buffers on your body’s blood sugar after you eat. They prevent blood sugar spikes, and the inevitable crashing feeling afterward. They also help keep you full and satisfied for a longer period of time. After we eat, our food goes to our stomachs and takes anywhere from one to four hours to be moved into our small intestines. Low-fiber carbohydrates get processed the quickest and can cause some rapid blood sugar rises. When you add protein, fat and/or fiber to a meal or snack, the speed at which your body digests your food slows down—which is great for blood sugar control! Slower digestion means we feel full and energized longer, and provides our body with a steady supply of nutrients.

Here are 7 tips to avoid a blood sugar crash:

Tip 1. Eat breakfast

Skipping meals, especially breakfast, can cause hunger and satiety-related hormones to get out of balance, which also means blood sugars start to be less stable.

Tip 2. Eat consistently

It’s important to feed yourself at consistent times throughout the day. There’s a reason our GI tracts, energy levels, and overall health can get out of whack when we aren’t in our routine.

Tip 3. Eat similarly-sized meals

Try to avoid having a small breakfast, medium lunch, and large dinner (like a lot of Americans do), and you also want to avoid the opposite (a large breakfast and so on …) Ideally, to keep blood sugar levels stable and prevent a big rise, and subsequent big fall, all of your meals should be about the same size/same amount of food.

Tip 4. Eat every four to six hours

Don’t go more than four to six hours without eating. This is very much related to number two above, and means you should plan ahead. Maybe you know you’ll be running between meetings at work, or out running errands and won’t be headed back home. Either way, if there’s a chance you’re going to have to go a long time between meals, it’s definitely wise to pack a snack.

Tip 5. Keep snacks handy

Keep high-quality, quality plant-based fat sources with you for when you’re on the go. As I mentioned above, fat takes longer to digest and helps keep us full longer. It also keeps blood sugars stable by delaying the release of carbohydrate from our stomachs. Great choices include:
  • Nut butter packets
  • String cheese
  • Avocados
  • Pumpkin seeds
  • Nut and trail mixes

Tip 6. Try not to eat carbohydrates by themselves

Pairing a carbohydrate source with a protein or fat source will keep you fuller longer, and help keep blood sugar levels stable. Instead of eating an apple or crackers by themselves, try pairing either with peanut butter or cheese for added fat and protein.

Tip 7. Choose higher-fiber carbs

Just like fat and protein, fiber slows down digestion, which as you know helps blood sugars stay steady. Some easy swaps are:
  • Crackers and bread made with whole grains instead of white flour
  • Bean-based pasta instead of white-flour pasta
  • Adding nuts and seeds to salads and sandwiches
  • Load up your next pizza with veggies
Now that you know some of these basic tips for avoiding blood sugar swings, you’re prepared to tackle the day with a steady supply of energy. If you’re curious about learning more, seek out your health care provider for more information.
Please note: The information contained in this article is not intended to treat, cure, or diagnose any medical condition and should not be treated as such. Please seek out your physician or dietitian before making changes to your diet.
 
Influencer - Mary Ellen - Milk & Honey Nutrition

About Mary Ellen

Mary Ellen Phipps, MPH, RDN, LD, is the Registered Dietitian, mom, food blogger and recipe developer behind milkandhoneynutrition.com. She’s also a type 1 diabetic and firmly believes food should bring us joy, not stress. Mary Ellen makes healthy eating easy, realistic and most importantly … fun! Visit her website and you’ll find yummy low-sugar, diabetes-friendly recipes the whole family will love … as well as helpful tips and a little mom humor.

milk & honey nutrition logo